Spicy Fermented Carrot Sticks Recipe

Spicy Fermented Carrots Sticks Recipe

Can you ferment carrots? Of course you can! I’ve seen several recipes for fermented carrots and finally decided to try it.

I wasn’t sure exactly what to expect when these would be finished but I can tell you it’s worth trying if you like pickles. I like spicy and I also like dill so I figured I’d try out Pickle Me Too’s Spicy Dilly Carrot Sticks and altered it just slightly.

The result is a great tangy, spicy, and also garlicy brine that lends a wonderful flavor to crispy carrots sticks. Since you’re not cooking these carrots, the texture remains fairly firm and still has that lovely crunch of a what you’d expect from lacto-fermented carrots. Even the sweetness of the carrot is still slightly there which works well with all the other flavors of tangy and salty.

I had actually made these for Thanksgiving, but then realized that these could be served at any holiday gathering or even at dinner.

I wouldn’t be surprised if you keep these pickled carrots around to just snack on when you want something that has a nice garlic bite to it to go along with the crunchy carrot flavor.

I hope you enjoy!

Spicy Fermented Carrot Sticks Recipe

Makes 1 quart jar

These spicy pickled carrot sticks make a great snack and are an interesting appetizer to add to a table before a meal.

Equipment

1 quart mason jar, wide-mouth, cleaned

1 half pint mason jar, cleaned (jelly jar for weight)

Plate (for overflow)

Ingredients

Carrots, sliced into sticks, enough to fill mason jar

4 garlic cloves, smashed

A few small slices of onion

1 tsp crushed red pepper or a few slices of hot peppers

1 tsp. dill, dried OR 2 tsp. dill, fresh (optional)

Non-chlorinated water, enough to fill jar when packed

Sea salt, to taste (I use 1 T. for a 1 quart mason jar)


  1. Wash and slice carrots into sticks and fill jar tightly leaving a small amount of space for garlic and onion.
  2. Put the mason jar on the plate in case of overflow.
  3. Put remaining ingredients in jar, shake or move ingredients to fill the crevices.
  4. Mix the water and sea salt, pour enough into the jar to cover, and leave a 1/2 inch to 1 inch gap at the top.
  5. Insert small mason jar into the mouth of the large one enough to submerge ingredients in the larger jar below the water line. Pour more water into the side if more water is needed. If the small jar floats, fill with water to weigh it down.
  6. Leave on the counter to ferment anywhere from 3 days to 2 weeks or more. The temperature in my house is usually about 72 degrees F, but for this recipe I like the carrots nice and fermented so a week or more is great for me. Try a carrot stick occasionally to see what level of tanginess you enjoy.
  7. Once fermentation is to your liking, put in the fridge or a cool root cellar where it should keep for a long time.

Thanksgiving Ferments in Progress

Thanksgiving Ferments

After putting together the Thanksgiving show last week, I figured I’d take a picture of a few of the things I have going that I’ll be serving up for Thanksgiving.

Of course I always have a to have some dill pickles on hand since they taste so good, but along with the normal pickles, I have a gallon of ginger ale brewing in two separate wine jugs, some fermented spicy carrot sticks, and some fermented green beans that I’ll be trying.

To go along with that, I’ll be starting a couple loaves of my no-knead bread tonight to bake tomorrow where I can then cube them up, toast them, and get those homemade bread crumbs turned into stuffing a little early!

I also plan on stopping by to pick up some artisan brined green and black olives to go along with the appetizers and no Thanksgiving is complete without my delicious mushroom gravy! I don’t think I’ll ferment the mushrooms just yet but I’ll be trying that after Thanksgiving to see what that tastes like.

It’s going to be a good meal! Hopefully you guys have some good stuff going too!

Episode 15 – Thanksgiving Ideas & Recipes with Fermentation

Thanksgiving Ideas & Recipes with FermentationIt’s time to give thanks and that means Thanksgiving is close! I decided to put together an episode to give you some ideas on how to add fermentation, fermented foods, and fermented drinks into your Thanksgiving dinner.

You might not think it, but Thanksgiving is actually a great time of the year for fermentation to shine! There are so many fresh foods that can be fermented and added to the Thanksgiving table including desserts. Whether it’s cranberries, stuffing, pies, wine, coffee, or chocolate, there’s several areas where fermentation can fit into the Thanksgiving meal.

I hope you enjoy this episode and don’t forget, time is short! Get started right away to get your ferments going for next week!

The other thing I want to stress is that this is a time for thanks, family, friends, and not a day for going out shopping with all the crazies out there at stores that insidiously decide to open their doors on Thanksgiving day. Stores like that shouldn’t be supported.

Anyways, I wish everyone a wonderful Thanksgiving and don’t get lost too far in your food coma!

Check out Jack Spirko of The Survival Podcast for his Thanksgiving Special Episode 2014 for a great story on why much of what we learn about Thanksgiving is wrong or inaccurate, how Thanksgiving became a way for our nation to heal and reunite after a terrible civil war, why Thanksgiving has been moved around to different dates, and what feasting actually meant 100 years ago. This is a must listen every Thanksgiving and it’s updated every year.

TOPICS INCLUDED IN TODAY’S FERMENTATION PODCAST:

  • You have less than a week to get your fermentations started and finished by Thanksgiving!
  • Incorporating fermented foods into your Thanksgiving meal
  • Fermented appetizers including pickles, carrots, green beans, onions, hummus, pickled eggs
  • Getting flavorful brined black and green olives better than what you’d get in a jar or can
  • Roasting garlic heads and mixing them with balsamic vinegar and also using balsamic vinegar for cherry tomatoes
  • Thoughts on cheese for Thanksgiving
  • Encouraging everyone to make their own butter and sour cream rather than buying it
  • Side dishes like fermented cranberries sauce, pumpkin butter, apple sauce, sweet potatoes, and pickle soup
  • My great-grandpa’s recipe for making sauteed sweet potatoes slices in a cast-iron skillet
  • Other side dishes like roasting roots like potatoes, butternut squash, and cauliflowers
  • Making fermented mashed potatoes with dill pickle juice
  • Fermenting mushrooms and making a nice homemade gravy using fermented mushrooms and soy sauce
  • Sourdough bread, sourdough pie crust, and encouraging you to make homemade whipped cream
  • After dinner, what desserts can be like pumpkin pie, chocolate along with drinks like ice wine, ice cider, and coffee
  • Alcoholic drinks like wine, mead, beer, and cider
  • Non-alcoholic drinks like lacto-fermented sodas, ginger ale, traditional Russian kvass, kombucha, and even pickle shots
  • And finally general tips for making your cooking more flavorful with techniques to capture, preserve, and enhance flavor

RECIPES MENTIONED IN TODAY’S SHOW:

Appetizers

Side Dishes

Breads & Grains

Desserts

Drinks

Fermented Thanksgiving Recipes In General

Savory Brown Mushroom Gravy Recipe

Savory Brown Mushroom Gravy Recipe

Ingredient List 1:

1 1/2 cups veggie broth or water

1 onion, finely chopped

1 16oz container cremini button mushrooms or baby portobellos, finely diced and sliced

1 tsp dried thyme

Ingredient List 2:

1 1/2 cups cashew milk (or other nondairy milk)

4 T soy sauce or tamari (or 3/4 tsp salt)

black pepper

1/2 tsp salt

Directions:

  1. Bring ingredient list 1 to boil in a pot, then simmer until fully cooked.
  2. Add ingredient list 2 and stir.
  3. Spoon out a bowl full of chunks and set aside.
  4. Pour remaining into a blender and blend until smooth or insert an immersion blender into pot to blend until smooth
  5. Pour chunks back into the gravy

Crock Pot Stuffing (or Dressing) Recipe

Crock Pot Stuffing Recipe

Ingredients:

2 cups chopped onions

1 1/2 cups thinly sliced celery

1 cup diced tart apple, peeled and cored

1/4 cup butter

1 tablespoon ground sage

1 teaspoon ground marjoram

3 teaspoon salt

1 teaspoon pepper

1/2 teaspoon savory (or sage)

1/2 teaspoon thyme

12 cups lightly toasted bread, cubes

1/2 cup fresh parsley, chopped

1 1/2 cups vegetable stock

Directions:

  1. In a large fry pan sautee onions, celery and apple in butter until onion is just translucent.
  2. Stir in sage, marjoram, salt, pepper, savory and thyme.
  3. Combine vegetable mixture with the bread cubes and parsley.
  4. Toss well.
  5. Pour stock over mixture, tossing well.
  6. Spoon into your crock-pot.
  7. Cover and cook on high for one hour.
  8. Reduce to low and continue cooking for 1-2 hours, stirring every hour.

LINKS FOR TODAY’S SHOW:

I’d love to hear your thoughts on today’s show so be sure to comment below or if you have an idea for the show, email me at paul at fermentationpodcast.com or just click on the Contact button on top of this page and fill out the form. I look forward to hearing from you!

Episode 14 – Making Kefir & the Kefirko Kickstarter with Marko, Andrej, & Niko

Kefirko Team Interview on The Fermentation Podcast

For today’s show, I have on the Kefirko team made up of Marko Borko, Andrej Glažar, and Niko Klanšek who created the Kefirko and currently has a Kickstarter running to get their product out into the market.

The Kefirko helps making milk kefir and water kefir much easier without so much mess. Yes, you can make kefir the old-fashioned way, which involves strainers, jars, etc. or you can support a few people who are trying to make a better life for themselves and are also expanding the offerings of fermentation-related products out there for us.

Their Kickstarter is well on their way to being funded and if you end up backing them, you’ll get your own Kefirko in the mail worldwide by May 2015.

TOPICS INCLUDED IN TODAY’S FERMENTATION PODCAST:

  • The creators of the Kefirko tell us what is kefir?
  • What the difference is between milk kefir and water kefir and what they taste like
  • Whether they like to use regular store-bought milk or raw milk
  • They go over a tip of making milk kefir but with non-dairy milk like coconut milk since it’s full-fat like dairy milk normally is so then you come out with a coconut milk kefir
  • What gave them the idea to come up with the Kefirko, who started off making kefir first, and some of the product development including the animation in the Kickstarter
  • How often they’re making kefir
  • Can you make kombucha in your Kefirko?
  • If you don’t have grains, they’ve set up Kefirhood which is a website that connects people that have kefir grains and kombucha scobies to share
  • If you get kefir grains in the mail, can you store them before using them and how do you store them?
  • What the normal process looks like on how to make kefir without a Kefirko
  • What is the Kefirko made of, which parts are glass, and which parts are plastic?
  • Describing what the Kefirko looks like and it’s function
  • Is the Kefirko air-tight?
  • When straining the Kefir grains through the strainer, will it catch some of the smallest kefir grains and how gravity affects particle sizes?
  • Since you can unscrew the top slightly to keep air-flow, could there be a problem with fruit flies and how can you alleviate that?
  • What is the size of the Kefirko and how many servings does the team make for themselves a day?
  • Since this first version is a test of the market to see if people are interested, are they going to be following up with larger versions of the Kefirko?
  • Will the Kefirko team think about making a lid compatible with a mason jar in the future and what are the challenges and drawbacks of that?
  • Since the Kefirko team is in Slovenia (southern central Europe), where all in the world are they shipping to? Which they replied that they’re shipping worldwide.
  • If this Kickstarter is successful, are they planning on expanding a line of fermentation tools or making more accessories to include making other things like butter or cheese?
  • Will they make a white Kefirko?
  • If they make their goal, what will be the first stretch goal that they will add?
  • What are the options for supporting the Kickstarter and the recipe book that comes with it with 30+ recipes

LINKS FOR TODAY’S SHOW:

I’d love to hear your thoughts on today’s show so be sure to comment below or if you have an idea for the show, email me at paul at fermentationpodcast.com or just click on the Contact button on top of this page and fill out the form. I look forward to hearing from you!

Kefirko Questions for Friday’s Show

I’m interviewing the creators of the Kefirko tomorrow morning on The Fermentation Podcast.

I have some questions I was going to ask, but do you have any questions you’d want me to ask them for you so you can hear it from them on Friday’s show?

The Kefirko is the container / strainer that helps you make milk & water kefirs.

Here’s their Kickstarter and the Kefirko site.

I’m not sure how many of you make milk kefir or water kefir but it looks like an interesting product so far!

Resources, Sandor Katz Interviews Audio & Video

Fermentation Podcast Resources

I thought I might start putting together some resources that I think will help people in getting started in fermentation. The more people out there fermenting, the more great recipes and know-how we can get into the general public again!

I’ll start putting somewhat of a knowledge base of how-to’s and some links to helpful posts that I’ve done, but first I thought I might start with good interviews done by Sandor Katz since he’s been the expert on this subject since it came back into popularity.

If you have any great audio or video by Sandor Katz I might have missed, let me know and I’ll add it!

What to do with Jalapenos and Using Fermentation

Bowl of jalapeno peppers

What should I do with this beautiful bowl of jalapenos?

Should I make pickled peppers? Hot sauce? Or should I try my new idea of making pickle salt but instead, make a spicy pickled pepper salt?

I recently published my Fermented Jalapeno Hot Sauce Recipe and explained how to do it in Episode 12 – How to Make Homemade Fermented Hot Sauce, but with this amazing problem to have, I figured I’d make a quick post and what I think I’ll do is try all three!

There are so many things you can do with jalapeños like making:

  • roasted jalapeños
  • freezing jalapeños
  • dehydrated jalapeños
  • canning jalapeños
  • stuffed jalapeño peppers
  • jalapeno jelly
  • spicy jalapeño salsa
  • storing them in oil in the refrigerator

But when it comes to fermentation and making pickled jalapeños etc, I see a few good things:

  • pickling jalapeños, either alone or with other vegetables & fruits
  • jalapeño hot sauce
  • fermented jalapeño salsa or relish
  • spicy jalapeño pickle salt
  • fermented jalapeño cheese
  • jalapeño sourdough bread
  • spicy jalapeño soda (yes, you can do this)
  • spicy jalapeño beer (I’ve tried this and it’s very spicy!)

If you have any amazing things that you’ve done with jalapenos, let me know! There are so many other great ideas but here a few! Happy fermenting!

Episode 13 – OhLardy.com Ladies Kelly Liston & Tamara Mannelly

Oh Lardy Ladies Kelly Liston & Tamara Mannelly

Today I have on the show the Oh Lardy ladies Kelly Liston & Tamara Mannelly from their blog OhLardy.com. We cover quite a few different areas in fermentation from fermenting mushrooms, holiday ferments like cranberries and apple butter, essential oils, and then go through their book on fermentation, Oh Lardy’s Guide to Fermenting Fruits & Vegetables.

They had me cracking up and were such a pleasure to talk to. They’re so full of information and they really just want to teach people all they know about Real Food, fermentation, and just health in general. I hope you enjoy today’s episode and try out some of their recipes.

The holidays are just around the corner so, get something fermenting!

TOPICS INCLUDED IN TODAY’S FERMENTATION PODCAST:

  • Kelly & Tamara’s journey on the path of Real Food and how they got into fermentation making their own bread, soaking grains, and fermenting foods
  • How the Oh Lardy ladies met in an unlikely way and started their joint project OhLardy.com together
  • What is “Real Food”?
  • Tamara’s first experience fermenting with the Nourishing Traditions book, sauerkraut, and taking a fermentation class
  • Some of their favorite ferments including a fermented cranberry sauce
  • Kelly’s experience fermenting mushrooms and how it actually tastes quite amazing
  • They talk about a nice fermented apple butter for the holidays
  • A couple mishaps like a batch of grated beets that were less than desired that turned white, a moldy batch of kombucha, and testy sourdough starter
  • How fermenting your chicken feed can help increase enzyme content, vitamins, digestion, boost usable protein, and how it can help your birds in their molting cycle and get back into the laying cycle
  • Fermenting comfrey in a 5 gallon bucket for an easy high nutrient liquid plant fertilizer
  • Using essential oils in fermentation like a small drop to flavor kombucha tea
  • What the Oh Lardy ladies cover in their fermentation classes and workshops in the Phoenix & Chicago areas
  • Teaching the “art” part of fermentation where there’s not always one way to ferment something as in to use a starter or to not use a starter
  • Things that a beginner could start fermenting that will get you going like fermented carrot sticks or salsa or things you might eat as a snack all the time anyways
  • Sneaking ferments into appetizers like fermented carrots blended up into a guacamole dip, into sandwiches, smoothies, or using the brine as a base for vinegar for salads
  • Their newest ventures into fermentation including milk kefir and tackling the elusive sourdough bread
  • How fermented foods and drinks are a regular part of their diet and different fermented offerings on their dinner table, packed in lunches and sometimes in breakfast
  • Their thoughts on fermented foods relating to health and well-being
  • They go through their beautiful book they co-wrote together Oh Lardy’s Guide to Fermenting Fruits & Vegetables

RECIPES MENTIONED IN TODAY’S SHOW:

LINKS FOR TODAY’S SHOW:

I’d love to hear your thoughts on today’s show so be sure to comment below or if you have an idea for the show, email me at paul at fermentationpodcast.com or just click on the Contact button on top of this page and fill out the form. I look forward to hearing from you!

Dehydrating Pickles & Fermented Dill Pickle Salt Recipe

How to dehydrate pickles & ferments

Dehydrated pickles? Did I just go there? That’s right, you can dehydrate ferments and at first taste, you might be tempted to toss them, but wait! There’s a good use for those extremely strong, salty, tangy flavors and you’ll see what I mean when you try my “Fermented Pickle Salt Recipe” which you could also think of as a fermented dill pickle powder.

The story behind how I came up with this idea was that I had 2 jars of dill pickles that went a little too soft for my taste. I almost composted them, but the mad fermentation scientist in me said that I needed to do an experiment.

Homemade dill pickles

Sliced chopped dill pickles

Dill pickle slices

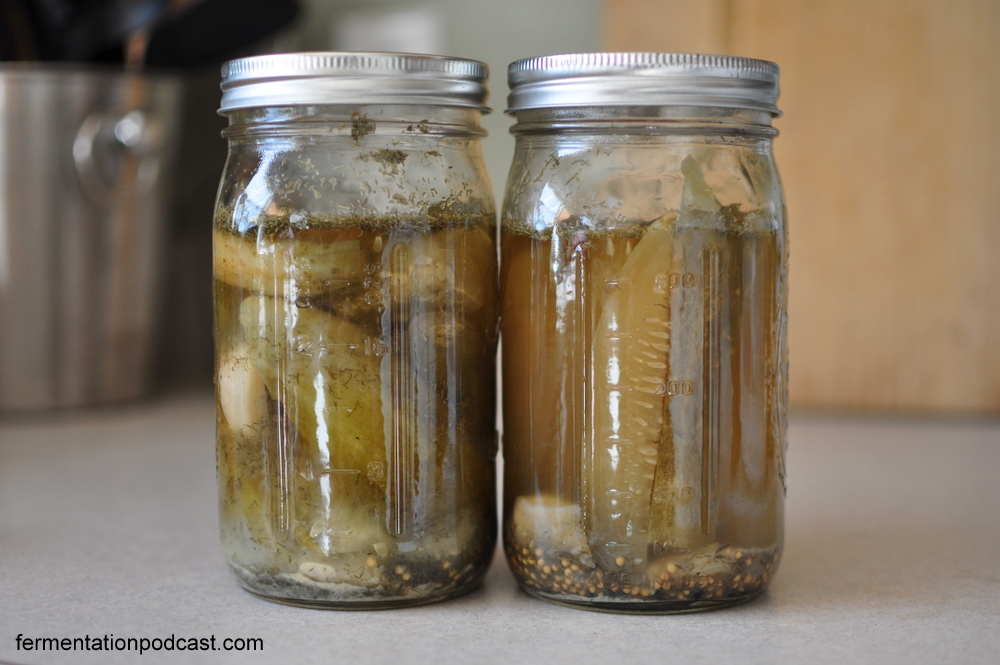
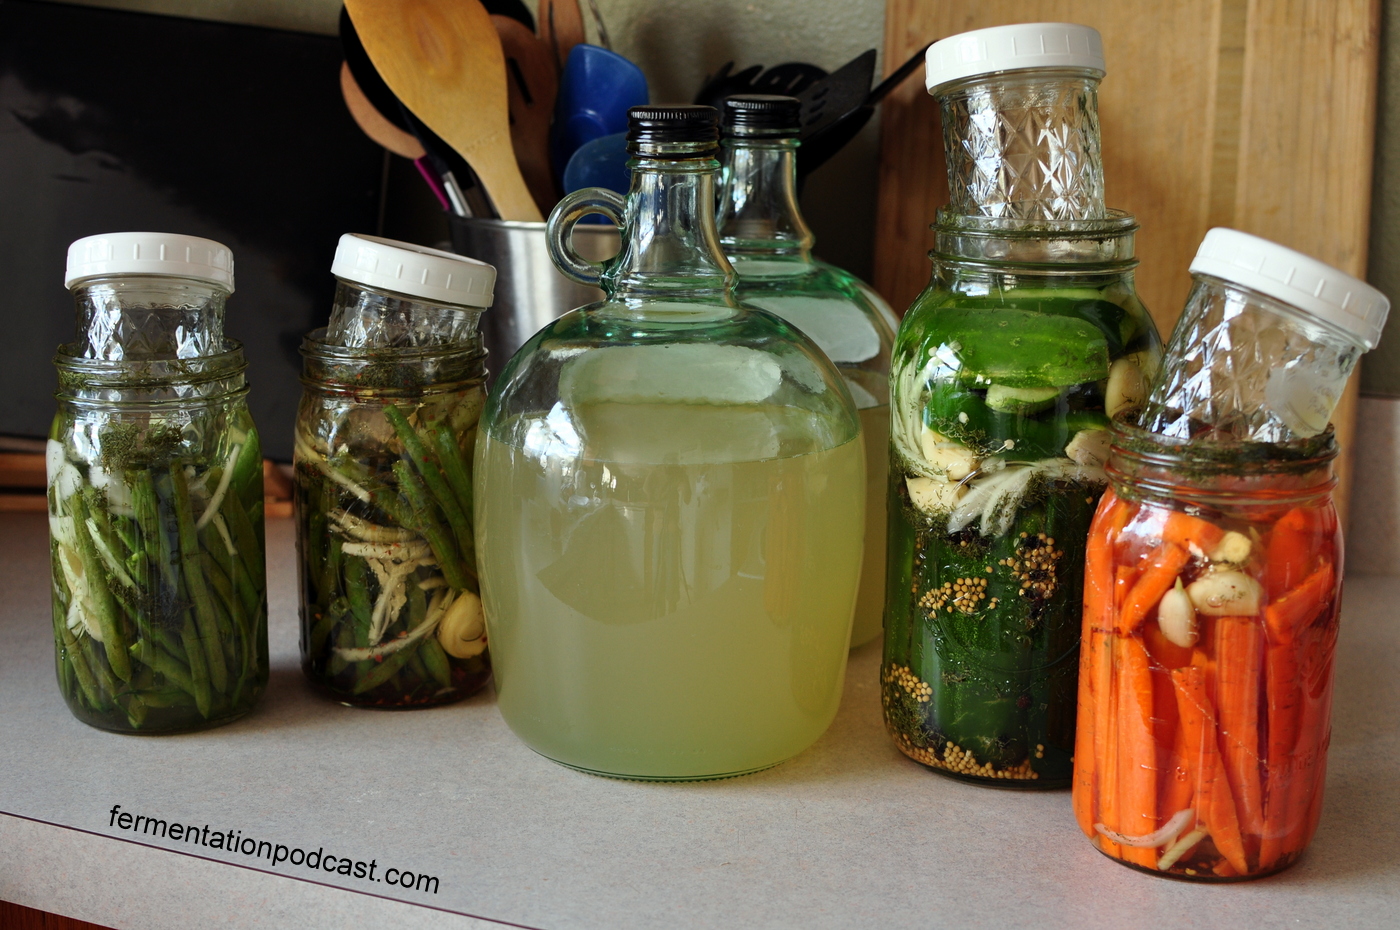
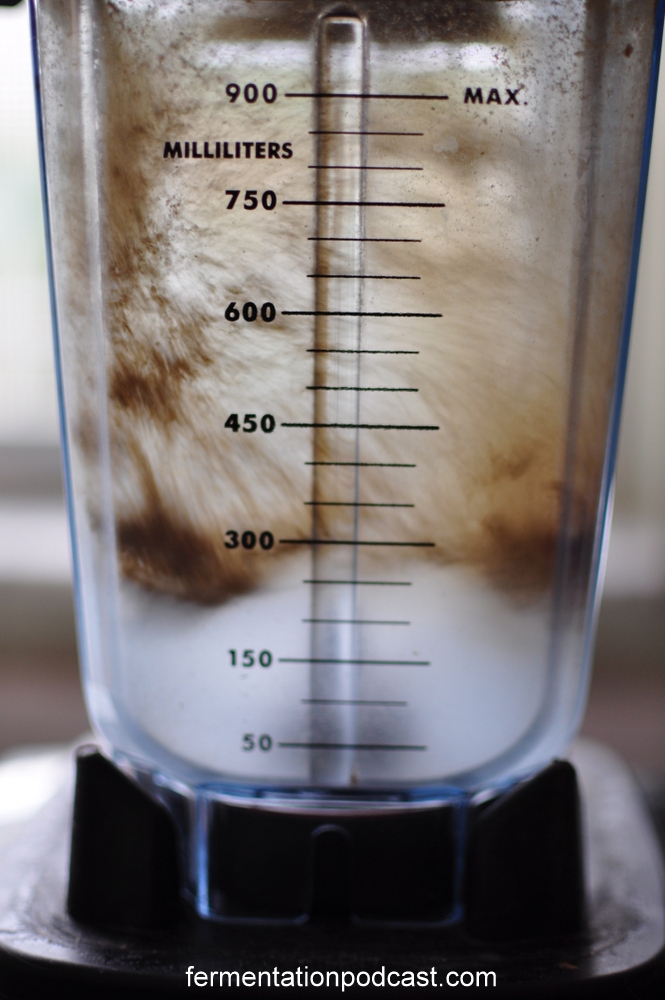
Interesting to see how different ferments turn out like the coloring above.

I actually let the jars sit on the counter for at least a couple weeks, which means they fermented much farther than my normal 3 day “half sour” dill pickle recipe and these are by far “full sour” pickles.

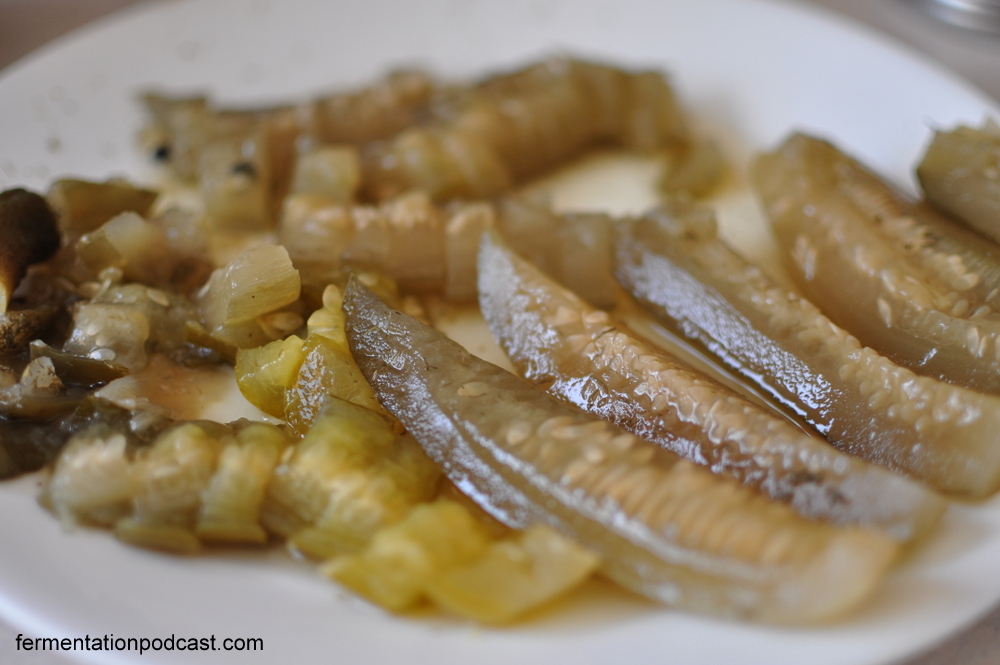
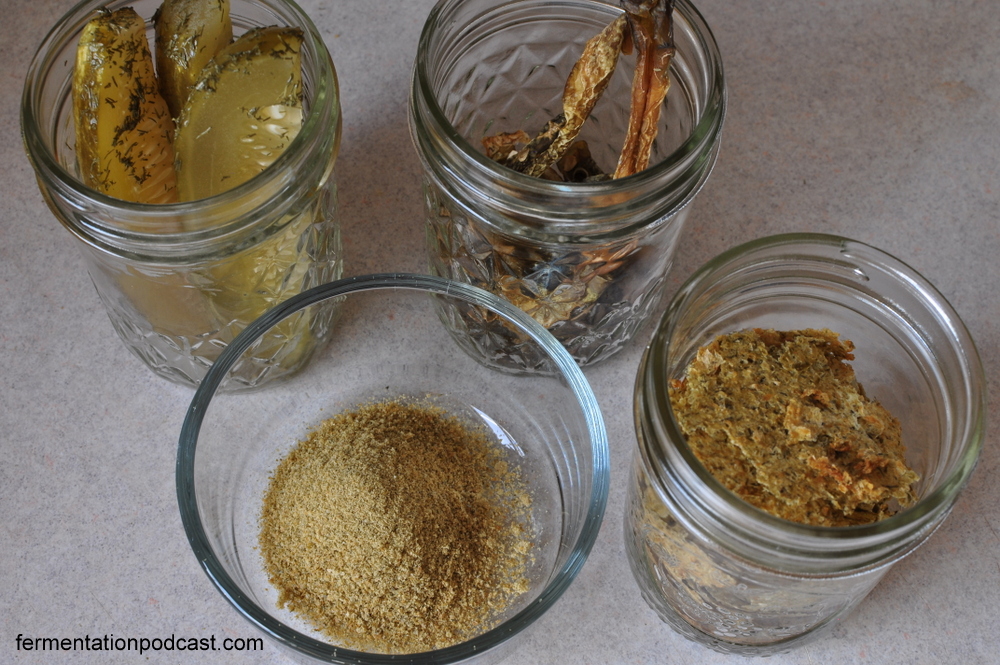
At first, I figured I’d just see what dehydrated pickle chips tasted like and then it occurred to me to try at least 4 different variations on this to see what I could do with each:

  • Dehydrated pickle spears – take a pickle spear and dehydrate it as is
  • Dehydrated pickle chips (slices) – slice a pickle into rounds or slice spears into chips and dehydrate
  • Dehydrated pickle leather – take a nicely fermented jar of sour dill pickles, blend them up along with the flavorful brine and garlic and dehydrate into a sheet
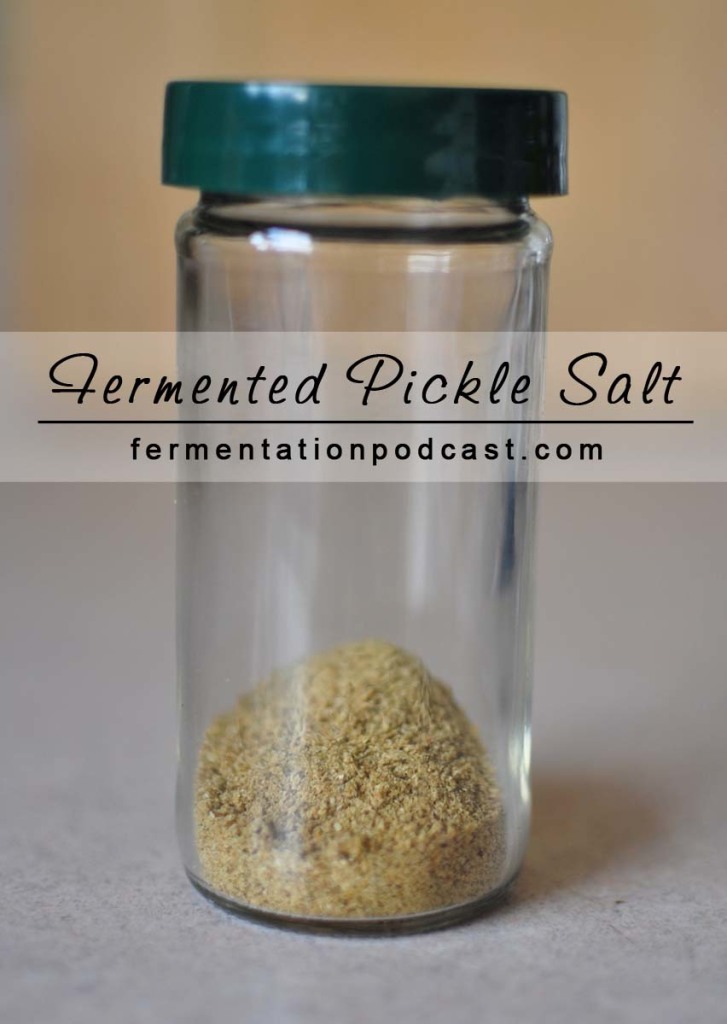
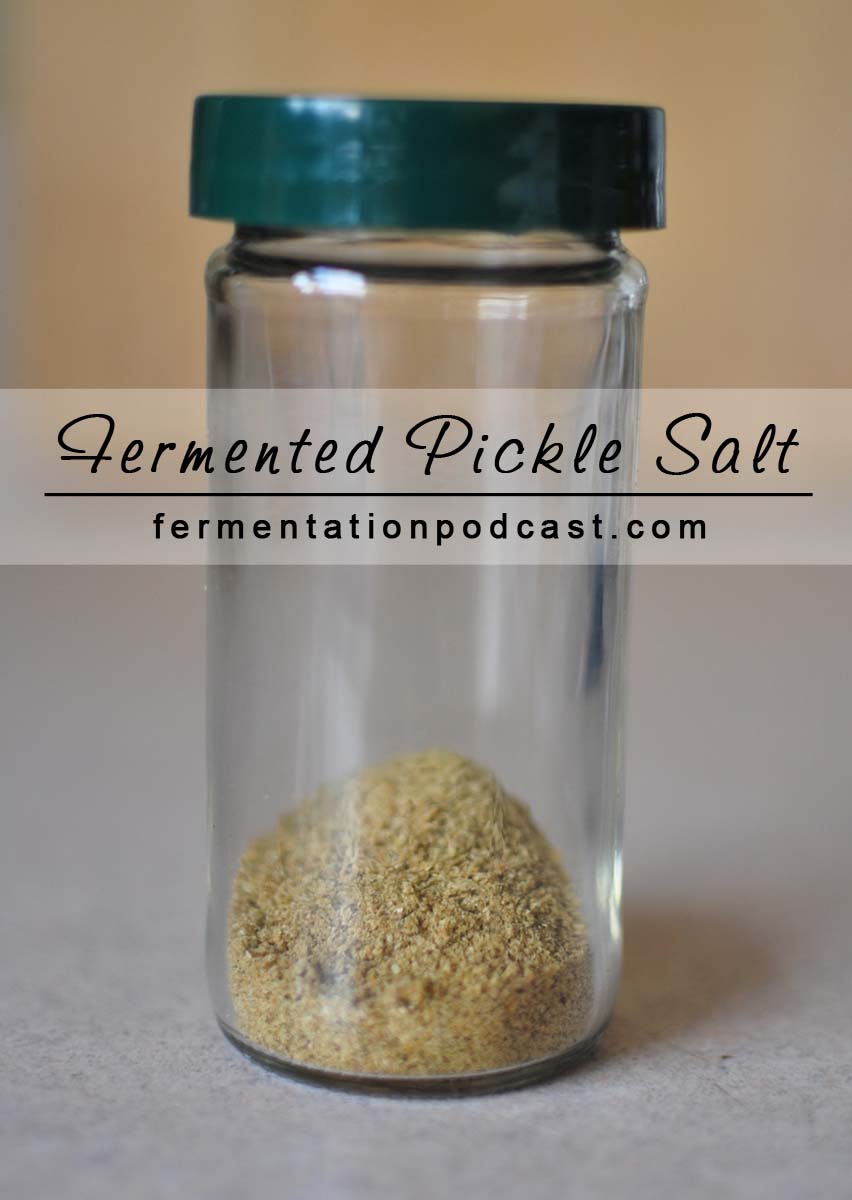
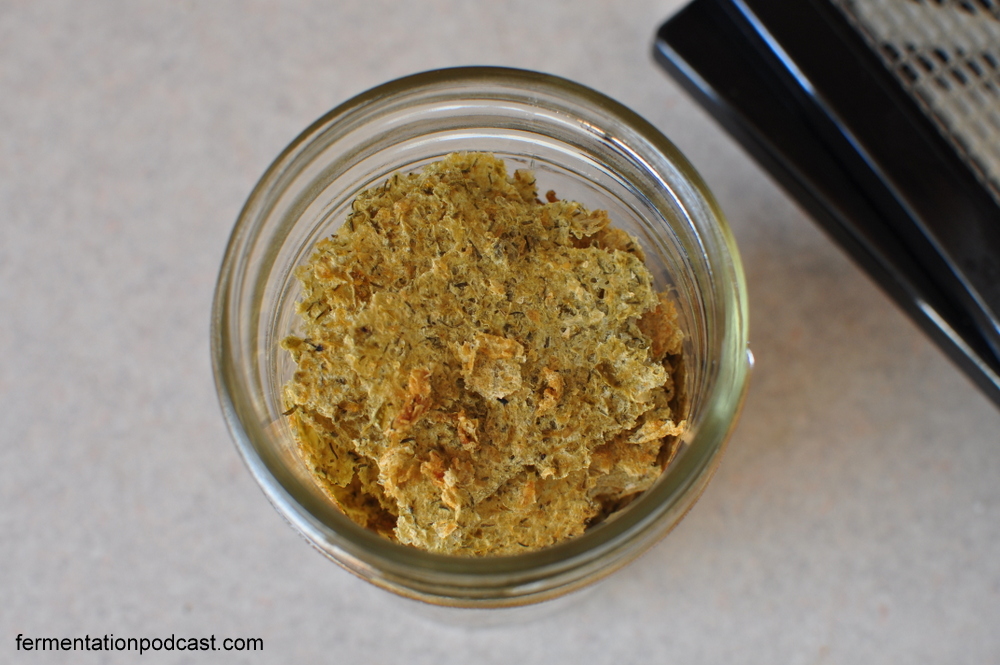
  • Dehydrated dill pickle powder (or pickle salt) – take the dehydrated pickle leather and then grind it into a powder. This can also be thought of as dill pickle salt since it’s concentrated, very salty, and can be sprinkled onto food or in soups.

Like I said before, at first I thought it was a total failure because the flavor was so concentrated and the salt was just too much when you took a nibble of the pickle leather or the pickle chips. Here are my thoughts on all 4 variations.

Dehydrating pickle chips

Dehydrated Pickle Spears

VERDICT: FAIL

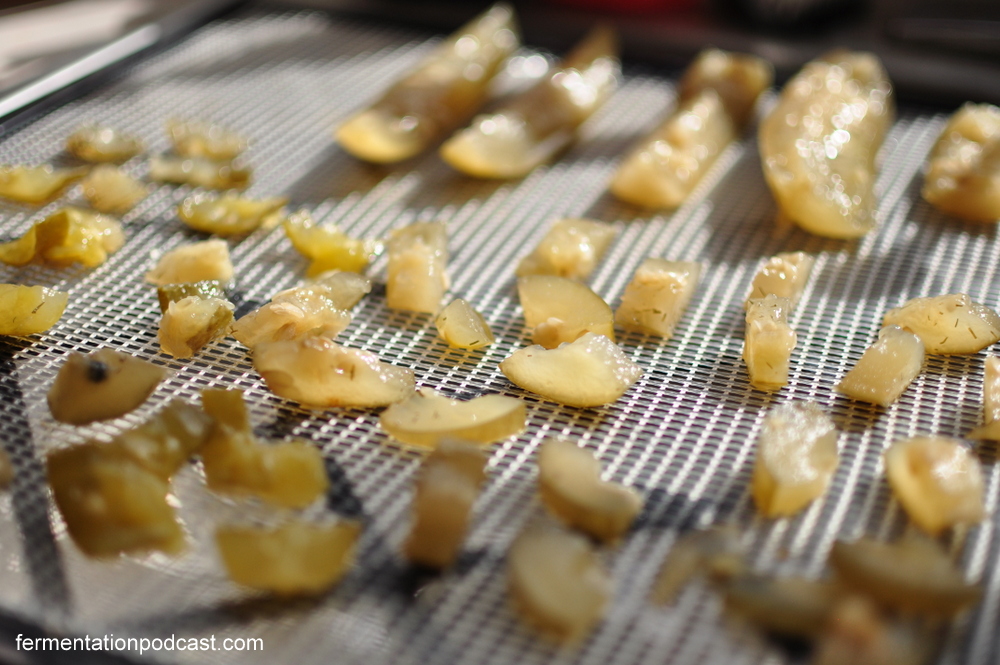
The spears didn’t dehydrate so well and actually curled in on themselves trapping more moisture. I really don’t see any use for dried pickle spears because they’re very tough and I guess you could call them pickle jerky at this point.

They could be cut up or ground up and used in soups or recipes, but I think cutting them or blending them beforehand will make the job much easier and give you a better end result so:

Dehydrated Pickle Chips

VERDICT: PARTIAL FAIL

I would say the dried pickle chips are only one step better than the spears, but if you wanted to store pickle chips in bulk in your food storage and keep the integrity of a pickle, this might be the way to do it. I would definitely not look to this as a survival food because it’s very strong.

Pickle chips could be thrown into soups like potato soups that might require a dill flavor, but they will not rehydrate back into a pickle that you would recognize. They could also be ground up into a powder, but you could skip all the cutting and go right to the next one.

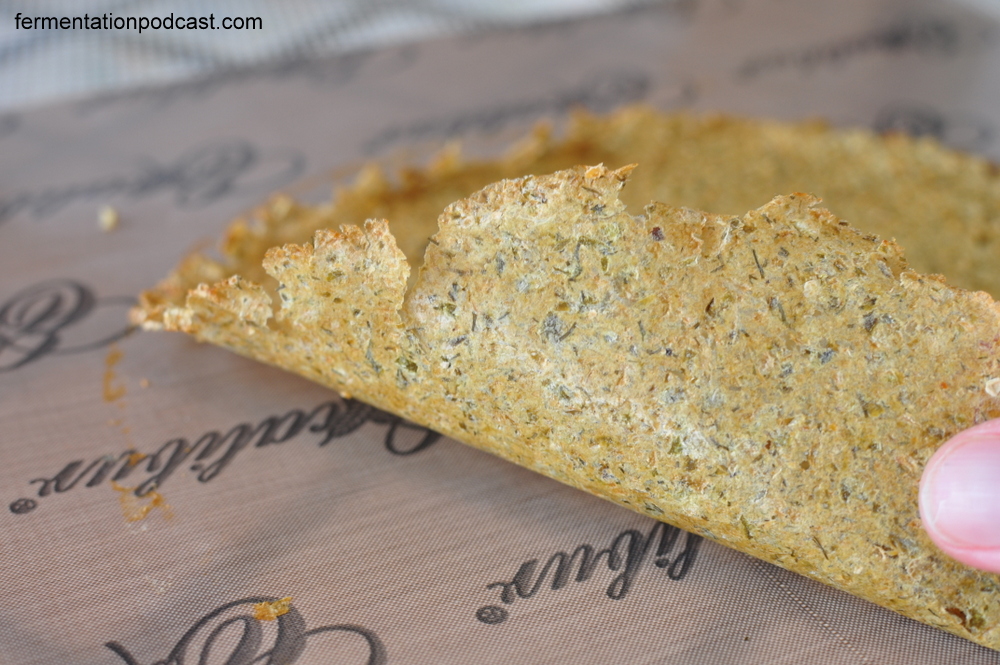
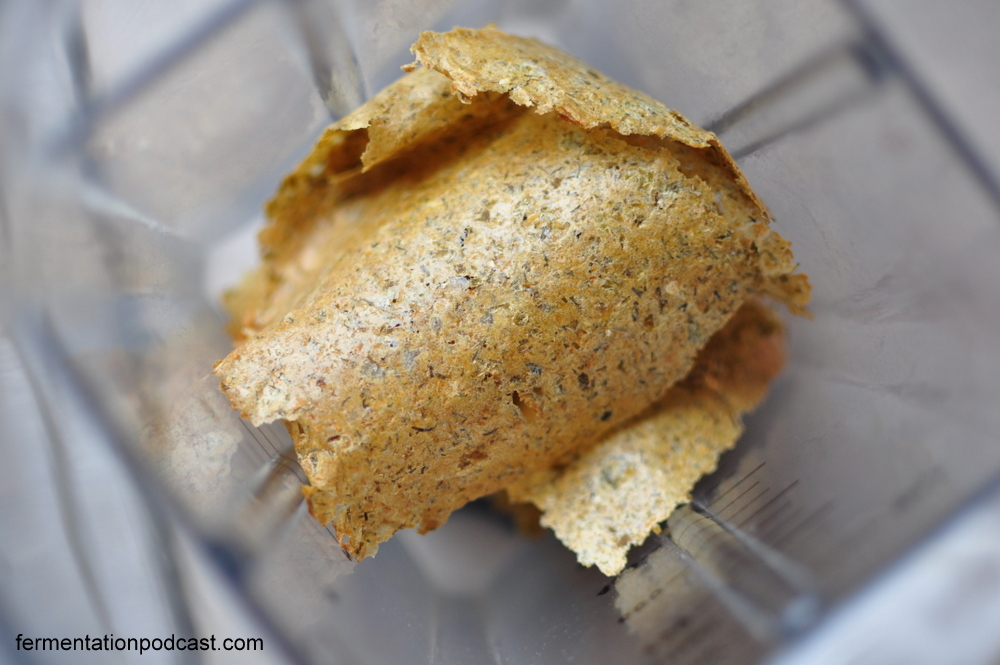
Dehydrated Pickle Leather

VERDICT: WIN

Pickle leather & fresh dill pickles

Torn pickle shreds

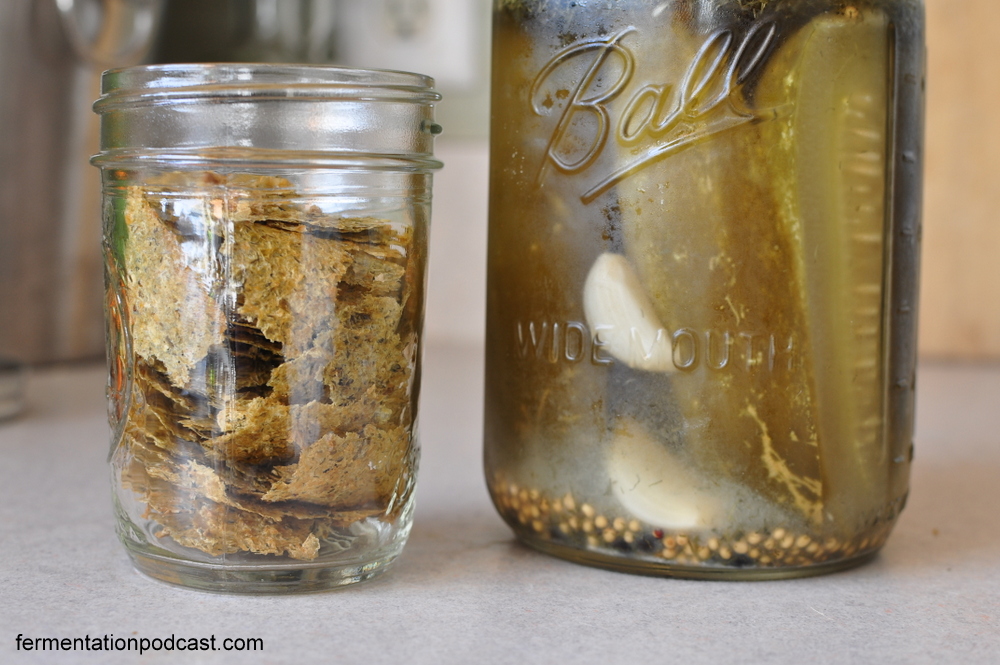
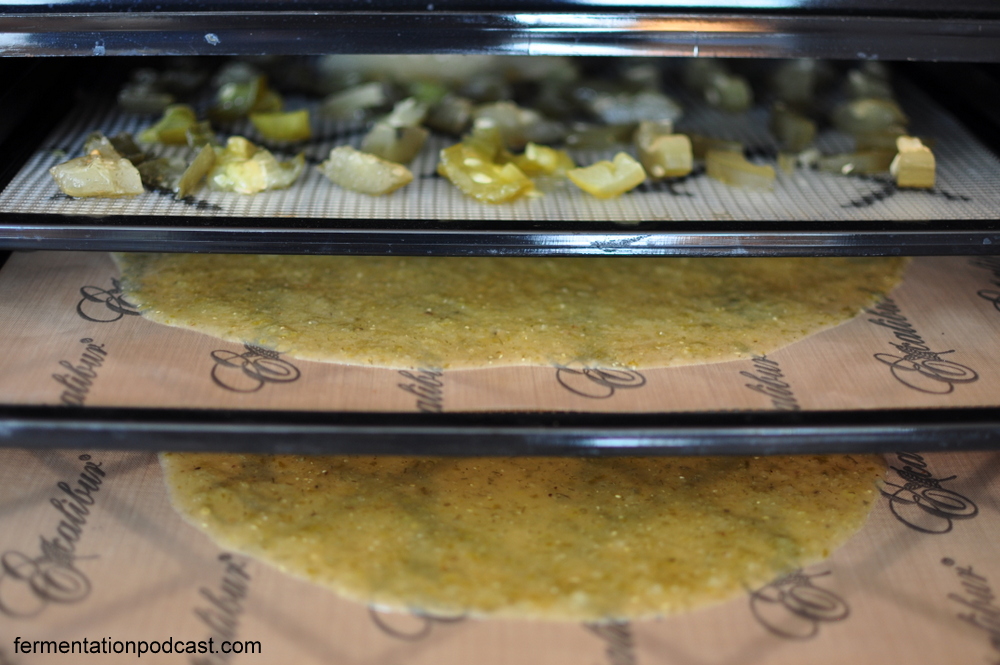
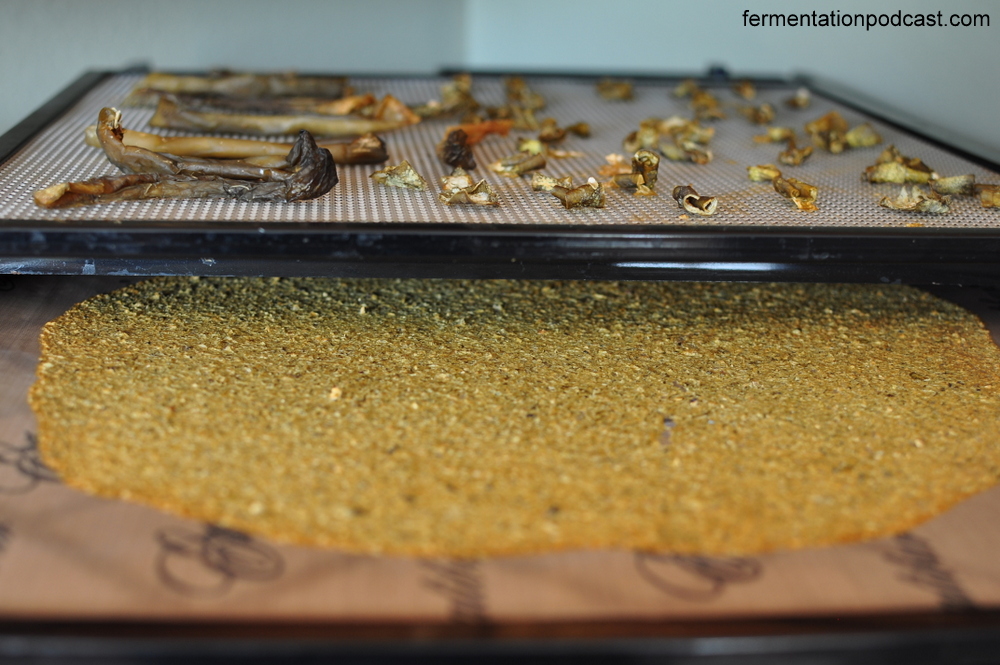
This is where things got interesting. When dehydrating ferments, you can blend them into the consistency of a smoothie, pour this onto your dehydrating trays that have a fruit leather sheet, and dehydrate away!

I let my Excalibur dehydrator go overnight and by morning, I had a nice crisp, dry sheet of extreme pickle flavor that I had two ideas for. The first option was to tear the sheet into several smaller pieces and store this in a jar. You could use these by dropping a few small sheets into any recipes that call for dill and salt like soups.

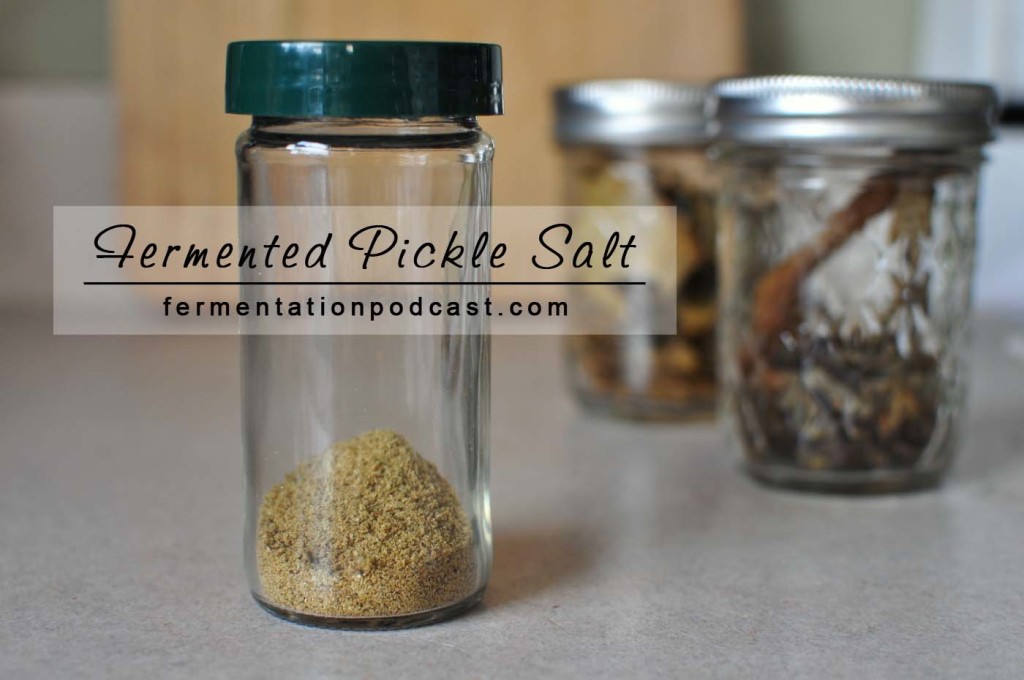
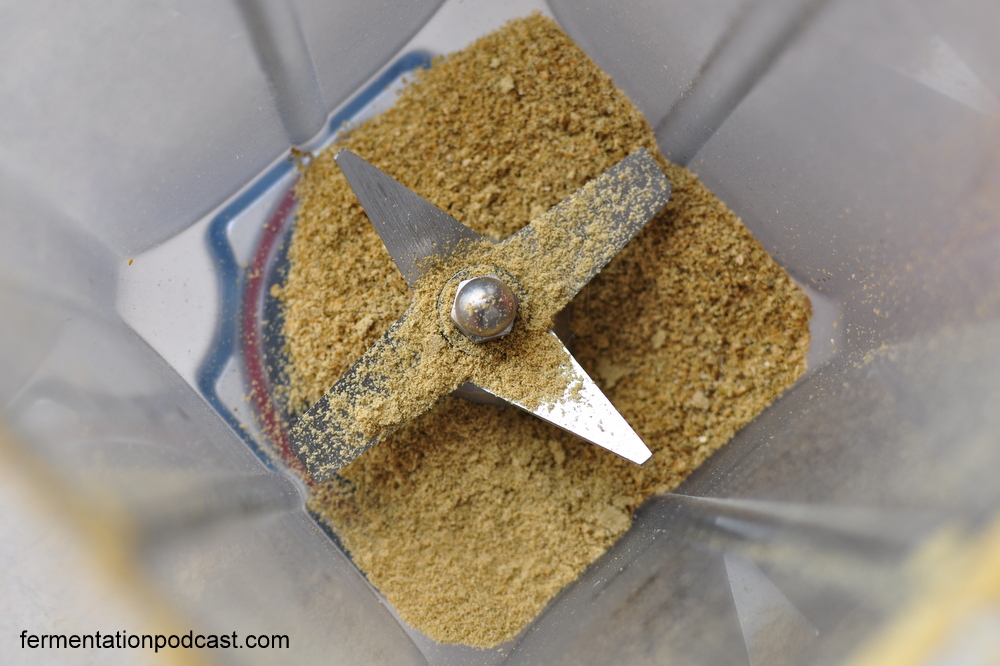
Dehydrated Dill Pickle Powder (or Pickle Salt)

VERDICT: BIG WIN!

The second way I could use my fermented pickle leather was to crumble the leather into my blender and grind it into a fine pickle powder or what I’ve come to think about it now as a fermented dill pickle salt.

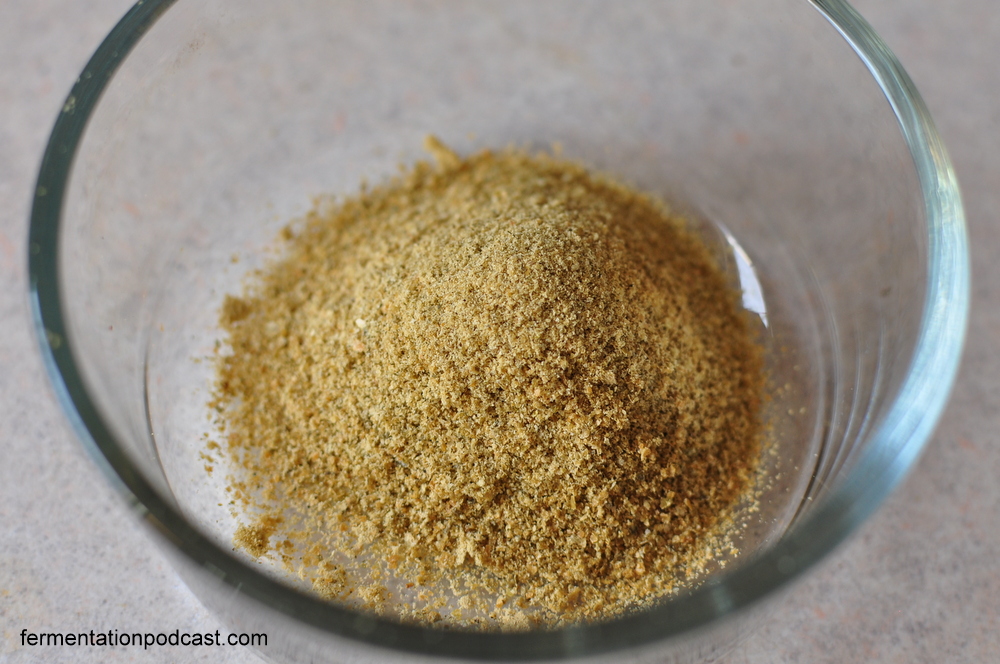
The nice thing about this fermented pickle powder is it’s extremely flavorful as in very tangy, it’s very salty, but salty with sea salt, and since it’s in powder form you can use as much or as little of it as you want.

This means you can sprinkle a dash into soups, shake some onto a sandwich that needs some flavor, tap a little onto cucumber slices or other veggies, or any other number of ways you could come up with for a flavorful salt.


Here’s what they all look like from fresh dill pickles, to dried spears & chips, shreds, and powder:

Drying fermented veggies

Dried or dehydrated pickles


Fermented Dill Pickle Salt Recipe

Makes maybe 1/4 to 1/2 cup of pickle salt.

This very flavorful pickle sea salt can be used as you would any kind of flavored salt to liven up a dish, sandwich, or sprinkled on raw veggies.

Take a jar of homemade pickles, strain the brine, and put your dill pickles into the blender along with anything else in there like garlic or some of the spices. It’s really up to you.

Blending pickles

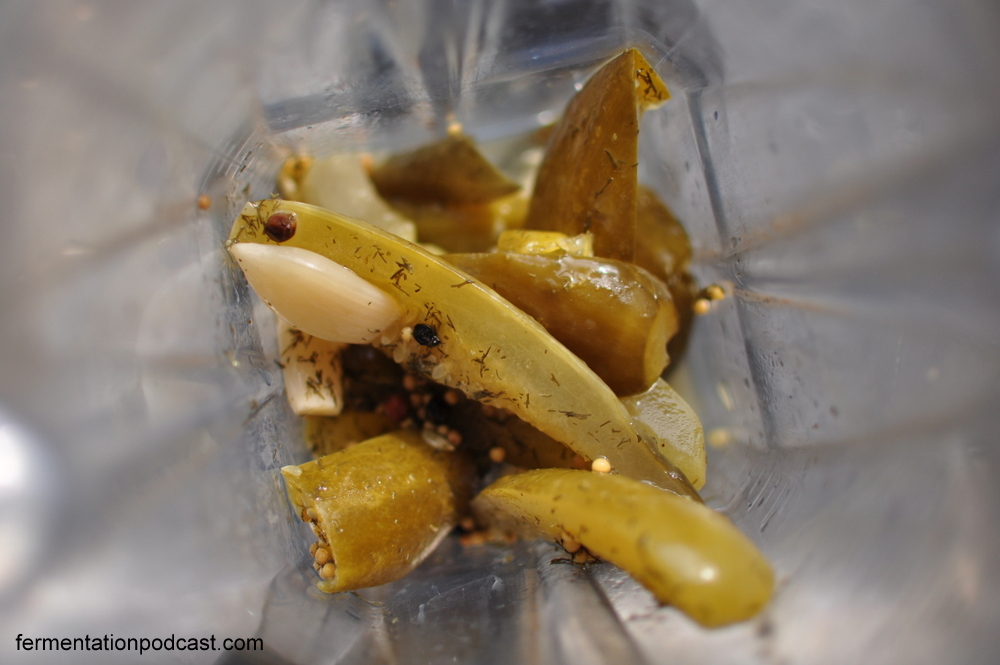
Pour a bit of the brine into the blender along with your pickles. I used about 1/3 or 1/4 of the volume of pickles so if you have 2 cups of pickles, use maybe 2/3 or 1/2 cup of brine. The end result is that you want the consistency of a smoothie.

Blending pickles brine

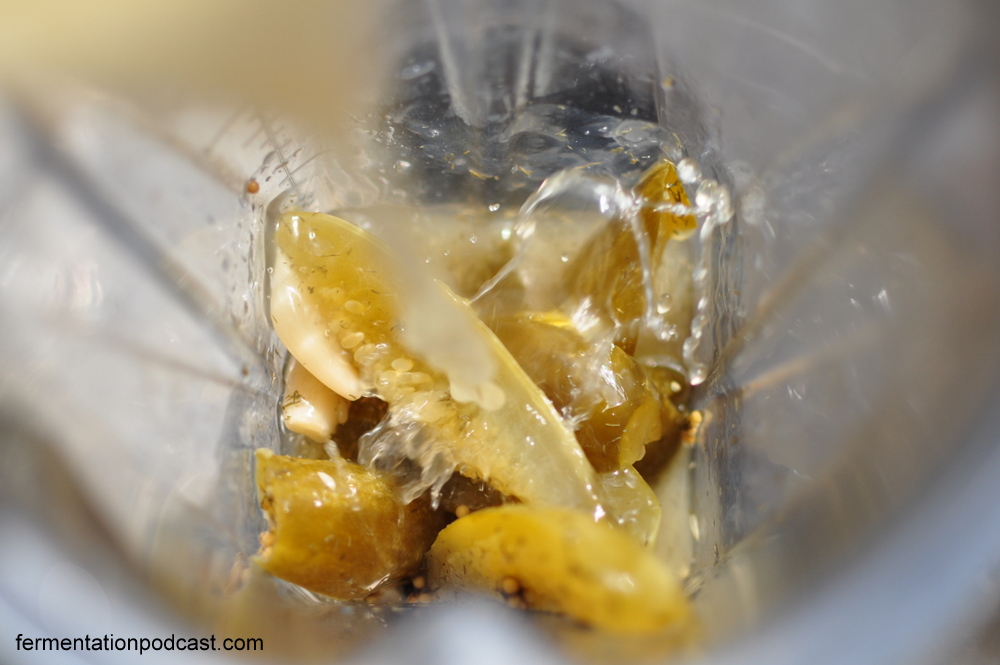
Blend to a nice, fine slurry and then pour this onto your dehydrating sheets.

Making fermented pickle leather

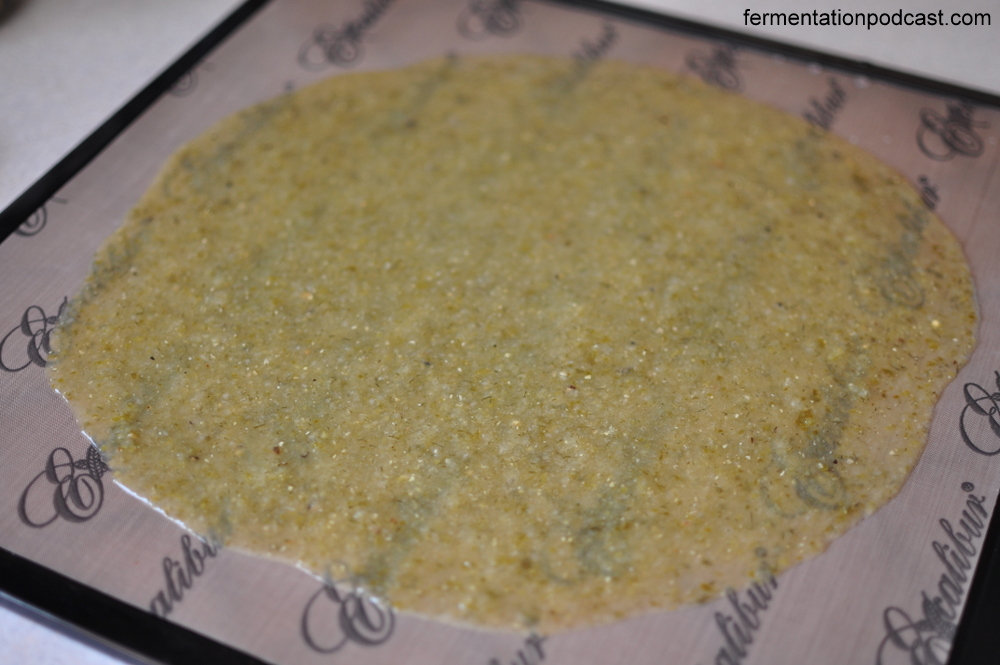
Dehydrate overnight or as long as it takes to dry the whole sheet. The edges dry first and will turn lighter in color, while the center will dry last so you’ll be able to tell.

Dehydrating pickles

Drying dehydrating ferments

Peel the dried pickle leather off the sheets and either tear some into pieces to save in a jar or tear up slightly and put them all into a blender or food processor to be ground fine.

Dried pickle leather

Pickle leather shreds

Grinding & dehydrating pickles

Ground pickle salt

You now have fermented pickle salt that you can put into a shaker or a small jar, but don’t forget! This is a dried product so moisture will cause it to clump, but you shouldn’t have to worry about mold since the moisture is so low and the acidity is still pretty acid.

Dried pickle powder

You might ask what is the best dehydrator out there? I only have experience with the amazing and wonderful Excalibur 9 tray model so that’s really all I can comment on, but it has quite a bit of drying space and has done a great job for me for several years now.

Conclusions on using a Dehydrator to Dehydrate Pickles & other Ferments

This will definitely work for other ferments and I hope you guys figure out some new ways to make and use some of these flavorful salts. As long as you keep the powders in a moisture free environment, they should keep for quite a while.

You could probably do like restaurants do and put grains of rice into your flavored salt shakers to keep them from clumping, otherwise you’ll just have to break it up now and again.

Some other ideas I think would work great to ferment, blend, dehydrate, and then grind into fermented salt would be:

  • fermented sweet pickled peppers
  • fermented spicy pickled peppers
  • sauerkraut?
  • kimchi?
  • fermented garlic
  • fermented onions
  • fermented tomatoes with salt (like a powdered ketchup?)
  • fermented salty lemons or limes (tangy lemon salt, yum!)

I hope I’ve given you a few ideas here and would LOVE to know what you might have come up with or come across that could be a variation of this and expand on it.

Let me know in the comments section below!

Fermented pickle salt recipe

Compost, Fermentation, & Building Soil Nutrients

What do you do with your food scraps from your kitchen? Do you compost them, harnessing the power of fermentation, or do you let those nutrients slip away from your home nutrient cycle and it’s out with the garbage, losing them forever?

Kitchen food scraps for compost

If you want to build rich, black, amazingly fluffy soil that you can then spread on the garden, then you need a compost bin!

Compost pails with food scraps

Compost buckets bins and pitchfork

For compost pails to hold food scraps in between dumping into the bins, I thoroughly cleaned out kitty litter pails.

Home composting is a responsible way to manage nutrients and put them back into the earth, growing something new for you to eat. This is a one guiding principle in permaculture, closing the nutrient cycle. Whether you’re on a homestead with large acreage or even in a tiny apartment, you can have a compost bin.

Papaya growing in compost bin

From the picture above, I’ve had papaya trees sprout right through a crack in my compost bin and I just let them go to see what they would do. They were not planted, have never been watered in all the months they’ve grown, and they’re twice as thick as papaya trees that I transplanted 1 year ago!

Through the wonder of fermentation, tiny bacteria, yeasts, and molds break down carbon materials (browns) that are mixed with nitrogen materials (greens). Also helping break down these larger nutrients above the microscopic world are quite a few insects and other life like worms and earwigs join the party creating one giant pile of activity.

Compost close up

On the micro side, it’s estimated that in 1 teaspoon of finished compost, there’s about 1 billion microorganisms.

That number is mind boggling, but it makes sense because when you start a large compost pile and turn it often the temperature begins to skyrocket and this temperature is maintained above 130 degrees F up to less than 150 degrees F when turned regularly. If you put your arm in a compost pile that hot, you wouldn’t be able to keep your hand in there very long.

I’ll go over two main methods for creating and maintaining a compost pile:

  1. Cold composting method – this can take between 6-12 months and is a set it and forget it type of method
  2. Host composting or Berkeley 18 day “fast” composting method – this method is quick, doesn’t lose much volume and lets you build soil quickly, but it takes more effort

Cold Composting Method

This is the method that I currently use because I don’t have a large need for a lot of compost regularly. When I get a bit more land and have a larger-scale garden then I’ll have to switch to the next method.

I built my two-bin compost system with cinder blocks stacked about 3 high which give me an inner chamber of about 4 feet long by 3 feed wide by 3 feet deep. This isn’t exactly perfect but it has worked for me for a few years now and has given me a good amount of rich, dark compost that I feed back to the garden in the spring and fall and also use for pots.

The method is as follow:

  • Begin filling the chambers with leaves, mulch, or other brown leafy materials
  • Green materials include kitchen food scraps, leaves that are still green and maybe shredded, lawn clippings, and some high nitrogen materials could include chicken manure, cow manure or comfrey
  • You want a ratio of browns to greens of about 25-30:1 but it doesn’t have to be perfect. Just pile leaves in and every time you have extra greens, pull the top of the pile back, mix them in, and cover it back up
  • You can turn the pile regularly with a pitch fork, but if you don’t, the pile should break down in 6-12 months
  • Be sure to keep the pile slightly moist, but if you live in a wet climate like I do (Florida), I just leave it uncovered and the rain waters it

With this method you’ll notice that the pile will shrink down regularly meaning that it was too hot at times possibly going anaerobic inside, and you’ll end up with less finished compost in the end, but you’ll also be putting out less effort.

Cold Composting = Slower = Less Effort = Less Finished Compost

Hot Composting or the Berkeley 18 Day “Fast” Composting Method

This method creates a large amount of compost

The method is as follow:

  • Create a pile that’s roughly 1 1/2 meters high which means it will probably be about the same width and layer with greens & browns like a lasagna along with watering the layers slightly
  • Brown materials include leaves, mulch, or other dried leafy materials
  • Green materials include kitchen food scraps, leaves that are still green and maybe shredded, lawn clippings, and some high nitrogen materials could include chicken manure, cow manure or comfrey
  • You want a ratio of browns to greens of about 25-30:1 but it doesn’t have to be perfect. Make sure to layer your browns and greens
  • Leave the pile for 4 days, then turn every 2 days after for a total of 18 days
  • When turning the pile, “peel” the outer layers off, putting those into the center of the newly formed pile every time it’s turned
  • Be sure to keep the pile slightly moist, but if you live in a wet climate like I do (Florida), I just leave it uncovered and the rain waters it
  • If it’s too moist, cover with a tarp

With this method you’ll notice that the pile will remain roughly the same size, and you’ll end up with almost the same amount of finished compost that you started with in material at the end, but you’ll also be putting out more effort with the turning of the pile constantly.

Hot Composting = Faster = Constant Effort = More Finished Compost

Composting in a Small Apartment or Renting

You can and you should!

If you live in a small place that doesn’t have a yard, or you’re renting and can’t set up compost bins, then you will want to make a “vermi-composter”, worm bin, or in other words, a composter that uses worms like red wigglers to break down your food scraps yielding two highly prized commodities:

  • Worm juice – this can be mixed with a large volume of water of maybe 10:1 water to worm juice which is then used as a liquid plant fertilizer
  • Worm castings – basically, this is worm poop that’s highly valued as an amazing soil amendment that can be mixed right into garden soil

Building Soil on a Large Scale

If you live on a large piece of property, have several acres, and want to build soil on a larger scale, then there is a different method to accomplish this en masse. To build soil by the acre instead of by the pile, compost piles won’t do it for you.

You have to partner with nature and this is where permaculture comes in.

I could make a whole article on this but to simplify, you need to do a cover crop of grasses that you can then chop and drop.

Whenever possible, try including nitrogen-fixing cover crops like alfalfa, clover, or leguminous types like winter peas and then for lots of biomass cover crop with grasses like rye, vetch, or winter wheat.

Combinations of these are great when you take into account which time of year these grow and when succession planting, you would just chop and drop letting the net succession of cover crops take over like how Masanobu Fukuoka describes in his “One Straw Revolution”.

In any case, building soil on the large scale REQUIRES cover crops and succession plantings.

Composting and Fermentation

Composting is just another way to think about fermentation.

Two bin compost system with cinder blocks

It is nature’s basic way of breaking down substances that use to be alive and rearranging them in a way that will make them useful to the next succession of organisms essentially making what was once living, live again.

When we’re creating our delicious concoctions of ginger ale or pickles or sourdough bread or any other number of good ferments, it’s interesting to think that the same processes at work on our fermented foods and drinks are the same processes that help create finished compost and give rise to the next generation of life.

When it comes to food & drinks, we’re just delaying and altering that process, but eventually, everything ends up back into the cycle of decomposing into the earth’s soil, mined up into the bodies of plants, flourishing into fruits that are then harvested, preserved, pickled, consumed, and on the process repeats.

It’s an honor and a joy when you realize that you can be the facilitator of that process, closing the loop of the nutrient cycle.

What do you think?