

Today I go over how to pickle okra with a good recipe that I think flavors it well. Okra, that long, crunchy, fresh vegetable that ends up being so slimy in the end. I had never really liked okra because of the slime issue and I still find it slightly creepy, but it grows so amazingly well in the summer, it’s hard not to figure out what to do with it.
One way to reduce the slime factor of okra is to batter it and deep fry it. The batter seems to soak up the slime somewhat, and while it’s good, there could be a little addition of some flavor by fermenting it. So using this pickled okra recipe, try battering and frying this and I’m sure it will end up being better than the normal fare.
Fresh okra has a much better flavor than canned okra and I think that pickled okra has a stronger flavor than either of the other two, but you be the judge!
Pickled Okra Recipe
Makes 2 quart jar
(for 1 quart divide ingredients by half)
Equipment:
2 quart mason jar, wide-mouth, cleaned
1 half pint mason jar, cleaned (jelly jar for weight)
Plate (for overflow)
Ingredients:
Fresh okra, enough to fill mason jar (1 – 2 dozen or so depending on size)
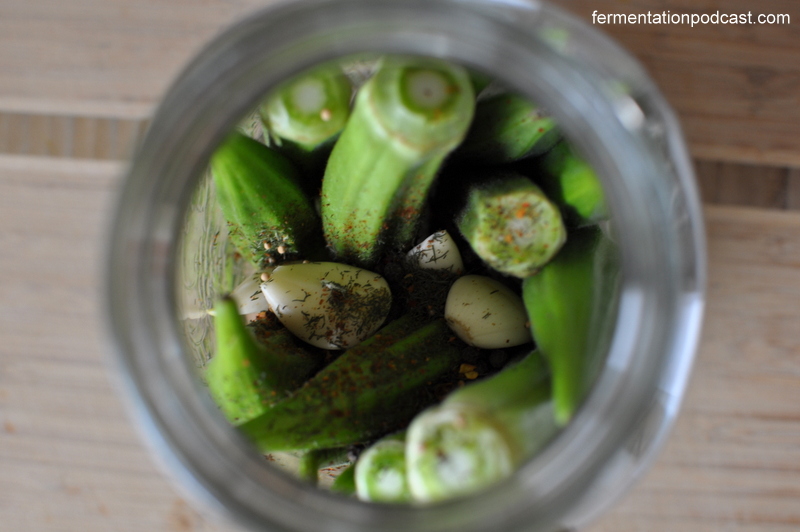
1 T. dill, dried OR 3 T. dill, fresh
8 garlic cloves, smashed
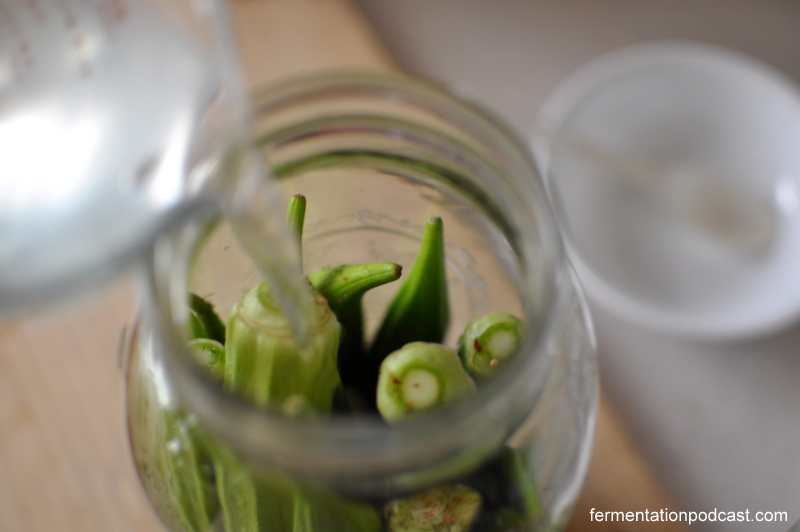
Non-chlorinated water, enough to fill jar when packed
Sea salt, to taste (I use 3/4 T. to 1 cup water ratio, but you can use less)
Optional:
2 tsp mustard seeds
2 tsp black peppercorns
2 hot peppers, diced OR 1/2 tsp crushed red pepper (for spicy)
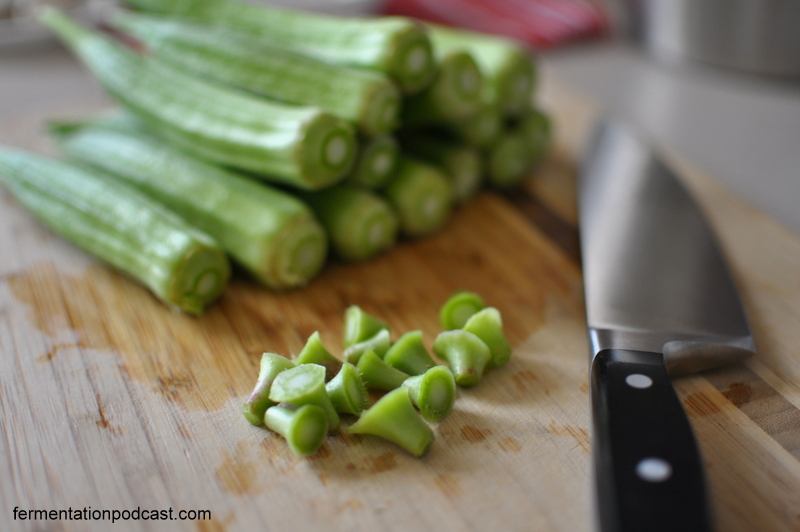
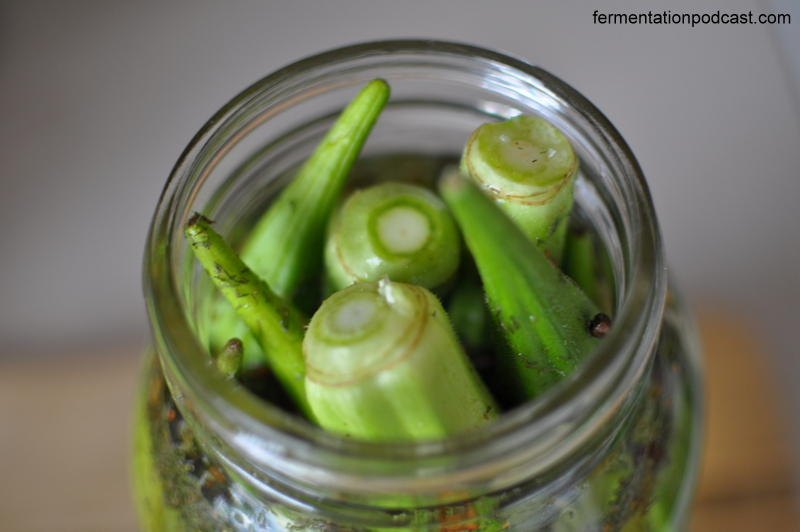
Choose okra that’s still slightly young. I had picked my okra just a little later than I should have and they were a little bit tough. The one good thing is that pickling okra softens them up slightly.
To start off, wash the okra and cut the stem off at the end.
Put the mason jar on the plate in case the brine overflows during the fermentation process. Pack the whole okra enough to create a tight fit in the mason jar. You can alternate them up and down to create a tighter fit.
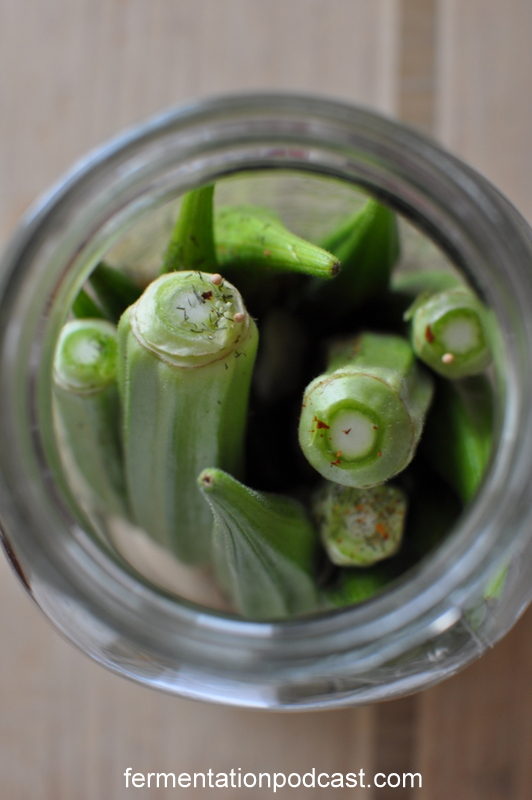
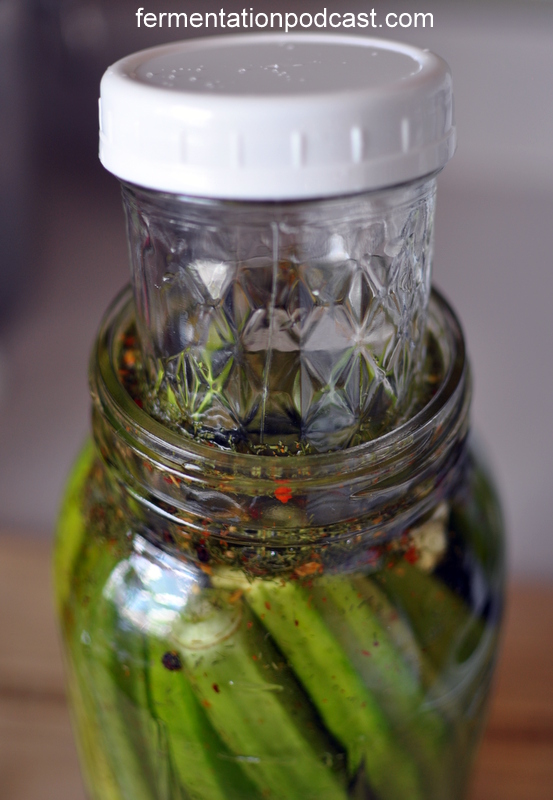
Put the remaining ingredients in the jar and shake or move ingredients to fill the crevices.
Mix the water and sea salt, pour enough into the jar to cover, and leave a 1/2 inch to 1 inch gap at the top. You’ll notice that as you add water, they’ll start to float to the top poking right out of the jar.
Now insert the small mason jar into the mouth of the large one enough to submerge the ingredients in the larger jar below the water line. Pour more water into the side if more water is needed and if the small jar floats, fill it with more water to weigh it down.
Leave on the counter to ferment anywhere from 3-7 days. The temperature in my house is usually about 72 degrees F so about 3 days is what I like. Try a slice of a okra every day to see what crispness or sour level you enjoy. Here’s a time lapse of what the okra looks like every day of the fermentation process: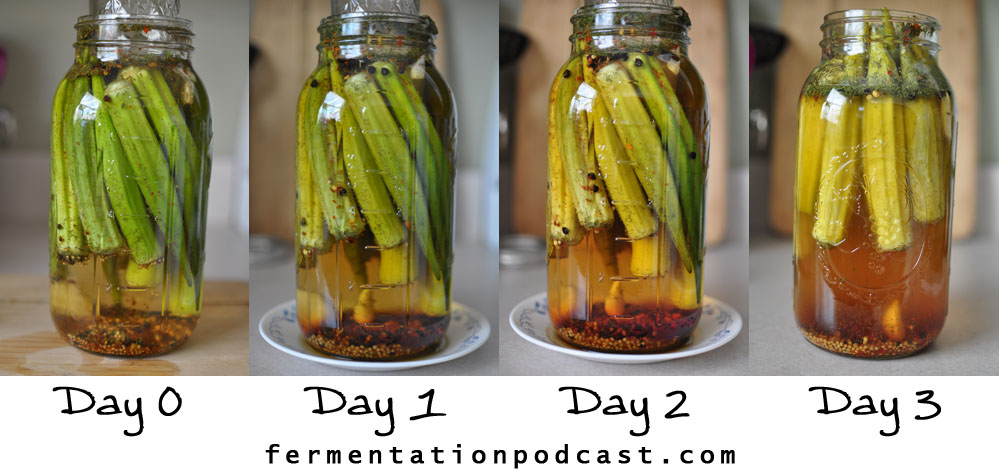 Once fermentation and taste is to your liking, put in the fridge or a cool root cellar where it should keep for quite a while.
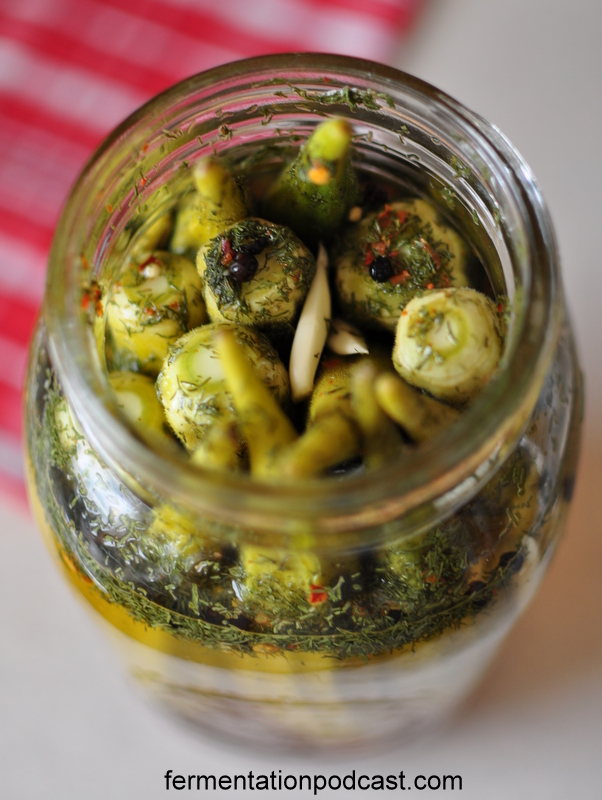
You can either slice these into rounds to put on sandwiches, to put in soups, or just munch on them whole if you’d like. Some people like freezing okra which you can do, but I normally just leave these in the jar until I’m ready to use them.
Let me know how you like the recipe in the comments below!


1 ping
[…] Fermented Okra – The Fermentation Podcast […]