Episode 12 – How to Make Homemade Fermented Hot Sauce

How to make homemade hot sauce

Imagine making your own homemade fermented hot sauce with an explosion of flavor. In this episode I take you through how to make homemade hot sauce the old fashioned way without cooking and vinegar but with a salt brine.

I’ve been making this hot sauce for years now and use it so much I actually have been putting it in wine bottles so that I never run out. There are so many different variations that you can do to this recipe that it should blow your mind!  For the entire recipe listed out see the previous post, Fermented Jalapeno Hot Sauce Recipe.

I hope you enjoy this episode as much as I enjoy hot sauce and also want to wish everyone a Happy Halloween!

TOPICS INCLUDED IN TODAY’S FERMENTATION PODCAST:

  • I start off talking about hot sauce and pretend to be a hot sauce sommelier by doing a live smelling and tasting of this spicy Jalapeno hot sauce recipe on the air and nearly lose my voice
  • Some ideas on where to use this homemade hot sauce and possibly give it as a gift
  • Ideas for different types of peppers and veggies that could contribute to your base hot sauce recipe like jalapenos, habaneros, pablanos, sweet peppers, and even veggies like carrots to extend the hot sauce and make it not so hot
  • When making hot sauce, a tip on separating batches into pickled peppers and reserving some to make hot sauce
  • Straining your pickled pepper mixture with sieves or nut milk bags
  • Making your hot sauce more interesting with several additions you can put in like different sweeteners like sugar or honey, sweet fruit like mango or pineapple, fresh herbs, getting citrus flavor from lemon or lime rinds, a smoky flavor with liquid smoke or roasting your peppers to make chipotle peppersh
  • Looking for more flavor inspiration by looking to popular brands of hot sauce like Tabasco or small hot sauce companies to see what they’re using for interesting flavors
  • Tips when making this hot sauce and precautions like: Wear gloves when chopping these peppers!

LINKS FOR TODAY’S SHOW:

I’d love to hear your thoughts on today’s show so be sure to comment below or if you have an idea for the show, email me at paul at fermentationpodcast.com or just click on the Contact button on top of this page and fill out the form. I look forward to hearing from you!

Fermented Jalapeno Hot Sauce Recipe

Fermented Jalapeno Hot Sauce Recipe

DISCLOSURE: This post may contain affiliate links, meaning I get a commission if you decide to make a purchase through my links, at no cost to you. Please read my disclosure for more info.

I’ve had a lot of people asking for my Fermented Jalapeno Hot Sauce Recipe and also just asking in general “How do you make homemade hot sauce?” so I figured I’d let you in on my secret.

To go along with this recipe, I also cover this in Episode 12 – How to Make Homemade Fermented Hot Sauce.

We also have an episode on our YouTube Channel! Make sure to subscribe so you don’t miss a thing.

Got Flavor in Your Hot Sauce?

If you want a hot sauce that has an amazing flavor with strong notes of garlic and onion but also has that great tangy vinegar flavor that you’d expect of a homemade hot sauce that you also wouldn’t be able to buy in the store, then you should love this recipe. It’s not the hottest hot sauce in the world unless you modify it and put habaneros or if you dare ghost peppers or scorpion peppers, but for myself, I really love sticking to the great flavor of Jalapenos.

Red & green jalapenos, garlic, and onions for hot sauce

I buy Jalapenos several quarts at a time from the farmer’s market at a discount and most of the time make very large batches of this that I can split up into two categories after they’re done fermenting. The two ways I like to use this recipe is for:

  • Fermented peppers that will be used on sandwiches and also rice & bean dishes like Indian
  • Fermented peppers that are destined to be blended up and then funneled into jars or bottles for amazingly flavorful hot sauce

First I’ll go over the process of how to make homemade hot sauce followed by my favorite green hot sauce recipe.

How to Make Homemade Hot Sauce

Making hot sauce homemade is a very simple process that I’ll outline as follows:

  • Choose your peppers that you will use to make your hot sauce. Choose wisely because they’re the stars of the show!
  • Slice your peppers into rounds (this gives you the option of using some for other things) and remove the stems (if you want less spicy remove the seeds but I suggest leaving them in), chop some onions and garlic as a great addition to the base flavor. Also chop up whatever other vegetables or fruits you’re adding.
  • Put peppers, onions, garlic and anything else you’re adding into a wide-mouth mason jar or your fermentation vessel
  • Mix up your salt brine with a ratio that tastes good to you which I suggest to be just a little saltier than you’d like because when you mix it with the peppers, it will water it down a little bit
  • Pour your salt brine into the jars to fully cover the ingredients
  • Use a glass fermentation weight or a smaller mason jar in the mouth of a larger mason jar to weigh down the ingredients
  • For lacto-fermented peppers, let ferment for maybe only a few days and be careful because they can get soft very easily. Store in the fridge
  • For lacto-fermented hot sauce, let ferment on the counter for 1 week to 1 month (whenever the ferment stops bubbling and there’s no activity)
  • Once complete, blend entire jar fairly well to a good smooth consistency and if you want hot sauce, strain with cheesecloth, nut milk bag, or a fine mesh into jars. If if you want a spoonable hot pepper sauce, funnel directly into jars without straining

Your highly flavorful hot sauce is full of beneficial probiotics and will last a very long time in the fridge or possibly on the shelf if you prefer. Most recipes call for cooking the entire slurry and then adding vinegar, which I think is a mistake. If you use the power of wild fermentation, the lactic acid bacteria create the acid for you removing the need for vinegar.

Test the pH yourself or just give it a big whiff and you’ll see that there’s plenty of acid in there.

Making Hot Sauce More Interesting

This goes without saying that you don’t need to adjust much to make hot sauce or pepper sauce even more interesting than it already is. It’s already hot, it’s already tangy, and it’s already salty, but for those who want even more uniqueness or spirit added to the mix try these:

  • Add sweet peppers to the mix to sweeten it up a bit
  • Try sugar, honey, maple syrup, or another sweetener to add the sweetness you’re going for
  • Things that can also add sweetness would be fruits like mango, pineapple, etc.
  • Infuse a different background of flavor with different fresh herbs that you might add like fresh basil, cilantro, or something really different like a mint
  • Maybe try adding a citrus flavor like lemon, lime, or orange juice
  • While you’re at it, citrus rind might make a give a great spark of citrus flavor
  • For a smoky flavor try adding liquid smoke
  • For an even better smoky flavor, try roasting the peppers first in the oven to get a black smoky skin (this makes chipotle peppers)
  • You can experiment with adding a starter culture but I find that it doesn’t need it. Of course, adding sauerkraut juice or even whey would change the flavor a bit
  • To extend your hot sauce farther like with habanero sauce, try adding carrots for color and more of a base and also diluting some of the spiciness
  • I’ve even heard some people adding tomatoes to it for a more tomato flavor

If you need more inspiration, look to your favor hot sauces and check out the ingredients to see what major brands or specialty “hot sauceries” are experimenting with. One of the most popular hot sauces ever is Tabasco and it just goes to show, you don’t need a ton of ingredients. Tabasco’s ingredient list is only 3 long.

Tabasco sauce ingredients

One of my favorite places that I love to visit while I’m in New Orleans is a place called the Pepper Palace. I’ve actually made myself sick for a night trying (at least twice) just about every hot sauce they had out for tasting.

I picked up a bottle of “Cajun Ghost” hot sauce and have been nursing the bottle for at least a year now hoping that it never runs out. Of course, with Ghost peppers added, a little goes a LONG way. At $15 a bottle, it was steep but I just looked at it as a way of paying for the great tasting they offered.

Cajun ghost pepper hot sauce ingredients

And now without further adieu, the deliciously green, tangy Jalapeno hot sauce.

Fermented Jalapeno Hot Sauce Recipe

(Makes 1 quart mason jar)

Other peppers like habanero, pablano ghost, or scorpion can be used but Jalapenos give me the flavor I like.

Jalapenos (about 10 or to fill jar 3/4), sliced into rounds (wear gloves or you’ll be sorry)
1/2 onion, sliced
4 garlic cloves, crushed & peel removed
1 tsp sea salt / cup of water (or to taste)
2 cups filtered water (non-chlorinated)

Fill the jar with jalapenos, onion, and garlic cloves.

In another container, dissolve the salt in the water.

Pour the salt water solution in the jar to cover ingredients.

Make sure the ingredients are submerged under the water. A glass fermentation weight or small mason jar (jelly jar) inside the mouth of a larger mason jar (wide mouth) should work to weigh down the ingredients. You can use an air lock if you have it but make sure the ingredients are submerged.

Leave at room temperature for 1 week to 1 month (or until bubbles stop and no action). For fermented peppers and not hot sauce maybe only 3 days or so (depends on the temperature of your home). Once you reach this stage, you’ll have a jar of pickled peppers like this.

Pickled Jalapeno Peppers

Blend the whole mix in a blender. If you’re spooning out peppers from another batch, just spoon some out, and then pour some of the brine into the blender to create a more liquid sauce like below.

Spicy pickled jalapeno peppers

Using fermented vinegar brine hot sauce

Fermented peppers hot sauce

Blended peppers hot sauce

For hot sauce strain into bottles through cheesecloth / fine mesh. For a spoonable pepper sauce or thicker hot sauce, just blend and pour into jars. I use a funnel.

Homemade hot sauce funnel

It should keep for a LONG time in the fridge although you probably don’t even need to refrigerate.

Bottled hot sauce

When I make this, I never want to run out so what I’ll do is usually make this by the gallon and store the vast majority of it in wine bottles! I’ll decant some of it into smaller hot sauce bottles that I can more easily pour it from.

For this recipe, I still had about half a wine bottle of hot sauce left so what I did was take a 1/2 gallon jar of pickled peppers that I was also eating from over 1 year ago, and just blended some up to fill the bottle the rest of the way. It’s always nice to have backup green sauce so I don’t run out!

Wine bottle jalapeno hot sauce

Fermented pickled jalapeno peppers

If I have a bit leftover after bottling the hot sauce, I’ll put some in a small mason jar and use that first to either spoon onto Mexican or even dip chips in but it’s almost too hot to use as a dip.

Jar homemade jalapeno sauce

Tips

You’ve decided to make a batch? Good! A couple tips that I’d suggest when making hot sauce the old-fashioned way:

  • If you choose not to strain the hot sauce and want to keep everything (the way I like it), then make sure to remove any reducer caps on your hot sauce bottles that restrict the amount of liquid coming out because you’ll never get enough out of the bottle
  • Instead of using cheesecloth or a fine mesh sieve and you’re making a small batch, try fermenting in a coffee press. The warning of course is I’m sure your next batch of coffee will be a spicy one!
  • Shake your beautiful green bottle of hot sauce up before use since the peppers like to separate and sink to the bottle while the liquid likes to float to the surface. There’s no thickener agents gumming it up so shake, shake, shake!
  • Save some empty wine bottles (or wine jugs) that have a screw on cap and use those for storing your hot sauce to refill your smaller hot sauce bottles later. Nothing is more satisfying than hearing the “glug.. glug.. glug..” from gallons of delicious hot sauce.
  • MAKE SURE TO WEAR GLOVES WHEN CHOPPING YOUR PEPPERS OR YOU WILL BE SORRY!
  • If for some reason you’re against wearing gloves or maybe you don’t have gloves, I’ve heard that rubbing your hands thoroughly with some kind of oil (like coconut oil) helps keep the capsaicin from soaking into your skin and you should be able to wash it off easier but gloves work best

I truly hope you enjoy this recipe and use it often as I do and if you have any exciting ingredient additions or modifications, let me know! I’m always up for some experimentation and new twists on great flavors.

How to make homemade hot sauce

Next up for me on hot sauce, I’ll have to figure out a great Sriracha Hot Sauce Recipe and when I do you’ll be the first to know!

Sandor Katz FERMENT Short Film

Recently there was a short film made with Sandor Katz called “FERMENT” created by Joe Zork, presented by the Southern Foodways Alliance, in association with the Southern Documentary Project. There are many videos of Sandor Katz but this one has a very personal, relaxed feel where you just see Sandor in his home element.

The video shown on Vimeo is a profile of Sandor Katz, winner of the 2014 Craig Claiborne Lifetime Achievement Award, and author of The Art of Fermentation and Wild Fermentation. It shows him chopping hot peppers and making a Chili Garlic Sauce while talking about fermentation and how fermentation relates to culture.

He explains how he grew up in New York City in Manhattan and later found a queer, rural commune in Tennessee that he lives near now in Woodbury, Tennessee.  He also tells the story of how he came to discover fermentation, the process, and the many flavorful things you can create.

Later as he’s chopping and squeezing cabbage for sauerkraut into a large ceramic crock, he talks about how the practice of fermentation is very ancient and pre-dates prehistoric times since there is no written record of the first practices of fermentation.

Culture and community play an important role when thinking of fermentation extending to the microorganisms in and on our bodies and also even culture in terms of communities forming ideas and “fermenting”.

How Long Does Sauerkraut, Pickles, or other Ferments Last?

How Long Does Sauerkraut Pickles or other Ferments Last in the Fridge?

DISCLOSURE: This post may contain affiliate links, meaning I get a commission if you decide to make a purchase through my links, at no cost to you. Please read my disclosure for more info.

Some common questions that I see people just getting into fermentation asking is “How long does homemade sauerkraut last?” or “How long do pickles last in the fridge?” In reality though, the question that you’re really trying to answer is actually:

“How long do homemade ferments last?”

There are many factors that determine the “shelf life” of a fermented food or fermented drink but in reality like with so many things, the general answer is:  It depends.

In the photo above I show a small collection of ferments that I have in the fridge and their ages as of today, some of which might surprise you.

When I answer the question of how long something fermented will last, I always preface this with saying that this is always a personal preference and I’m just answering for what I do. You always have to figure out what your comfort level is and what you feel is right for you.

For me though, it always boils down to the test we do with our senses. When dealing with fresh and fermented food like this, we’ve always had these amazing senses that give us a clue as to what is good and what might not be so good to eat or drink.

Today foods are so saturated with chemicals, artificial colors, artificial flavors, and even gassed to extend their shelf-life or make them appear fresher than what our natural senses can perceive. Lucky for us though, if you’re reading this and fermenting natural foods, you don’t have to worry about this problem and should be able to figure out what’s okay to eat or drink.

In general when it comes to homemade fermented products (not canned products), what I do is use my senses and make a decision based on that with 3 simple tests:

The Sight Test

  • Is there any mold (as opposed to kahm yeast) on your fermented food or beverage?
  • If there is mold, can it be removed and what’s left under the brine be salvaged? (I went over this recently in the Episode 11 show and also my post Five Questions on Mold & Food Safety
  • Has it turned strange colors?

The Smell Test

  • Does it smell rancid or moldy?
  • Does it have an “off” smell that doesn’t smell like what you’re expecting?

The Taste Test

After I determine the first two, if it’s passed those two test, I go ahead and give it the old taste test.

  • Does it taste bad or have off flavors?
  • Does it taste like you’re expecting?

Normally our senses can tell us when something can either make you sick or is bad for you. Like I mentioned above, if it’s a canned product and is low acid, it’s possible that Clostridium botulinum (the bacteria that’s responsible for botulism) could grow because it’s a sealed environment and low acid. Ferments that you make at home are normally high acid so botulism is less of a worry, but in canned products our senses can’t necessarily tell you that there’s a community of botulinum about to make you sick.

Factors that Affect the Life of Your Ferments

There are several factors that I’ve covered before that extend the life of ferments but here are a few:

  • Temperature – this is one of the biggest factors. When a ferment is to your liking, this is why it gets moved to the refrigerator. The cold temperature slows down the decomposition process and almost suspends the ferment indefinitely.
  • Acid – when most homemade ferments reach their best level, acid is formed that helps to preserve them.
  • Anaerobic Environment – keep out the oxygen! Mold loves oxygen. Keep your items submerged and away from oxygen with glass fermentation weights and fermentation lids with air locks.

Shelf Life of Canned Foods vs. Fermented Foods

Canned products have a remarkable shelf life and there have even been tests done on canned foods by the U.S. Army that have determined that many cans are safe to eat many years or even decades after the expiration date.

The only problem with canned foods is that the high level of heat treatment to sterilize the cans or jars also destroys the nutrients, taste, and life that would normally be in that food.

The canning process has been a remarkable discovery and definitely has a great place in terms of a long term food supply that everyone should have as a backup, but if you want healthier food, then fresh and fermented foods and drinks are the way to go.

To put it more simply, shelf-stable long-term storable foods are canned and do less for you in terms of flavor and nutrition, and fermented foods are for every day, short term, but are more nutritious and flavorful.

Personal Taste Preference

Another big factor in terms of keeping your precious ferment around is your personal taste. If you don’t like the texture of something, it’s time to put the nutrients back into the garden and get another one going that you do like.

I’ve had pickles that are perfectly edible and perfectly safe to eat, but they’ve just gotten too soft for my taste. One big tip: before throwing it out, make sure you can’t turn that into something you will enjoy!  For example, I love pickled peppers, but sometimes they’ve gone long enough to where now they’re too soft for my taste, but instead of throwing them out, I blend them up and make a wonderful pickled pepper hot sauce!

Conclusions

Like in the photo above, I have ferments that are more than 2 years old and that still look, smell, and taste great and I have no worry consuming them. I even recently saw someone post that they have a prized batch of kimchi that’s going on 8 years old in their fridge! That’s quite a long time for something to stick around as more than often, it’s either eaten or drank well before you’d ever think about whether it’s still good.

In today’s world with recommendations of throwing something away after having it in your fridge for more than 3 days, keeping it in the realm of of years would probably scare the majority of people to death and would be unthinkable, but I’m very comfortable with the idea now and have been following this for quite a while.

Most of the time, one of the major factors for me of getting rid of something is more of the texture, so if I have a batch of pickles that are just too soft for my taste, they go into the compost and it’s on to another batch.

When it comes to food safety, it’s always up to you, but you just might be surprised in ancient wisdom and the power of fermentation in extending the shelf life of foods while still retaining their nutrition and flavor.

Episode 11 – Listener Feedback, Cashew Cheese, Mold, & Food Safety

Mold hyphae fruiting bodies

Today I have an interesting mix of a show with a first time of listener feedback where I go over emails that people have written me and questions relating to fermentation or the show. I also remind everyone that just listens to the podcast and doesn’t get out to the website, there’s tons of pictures here!

I go over in detail the recipe for a basic vegan fermented cashew cheese and the round the show off with some of the posts I’ve done recently on mold & food safety. If you haven’t seen some of the pictures of the up close shots of mold, it will boggle the mind.

TOPICS INCLUDED IN TODAY’S FERMENTATION PODCAST:

  • The first listener feedback segment of the show where I cover
    • Someone making holiday pickles
    • A show suggestion of aerobic vs. anaerobic fermentation and the idea of a “fermentary”
    • Having fermentation knowledge in a SHTF scenario and making food last longer in things like a just a power outage like what you’d get from a snow storm or a hurricane
    • Thoughts on a SHTF scenario in terms of long term storable food like grains and beans and making tempeh from soybeans
    • One listener shares a good recipe for Pineapple Slices and Hot Peppers in a Salt Brine
    • One person’s theory on the origin of fermenting from peoples living near the sea shore and a fermented duck egg that’s fermented for a year
    • The interesting idea of fermenting things by burying them at the beach to let the salt brine cure them
    • The microbiome diet and how a 76 year old man keeps healthy, happy, and gets out to walk along with eating fermented foods on a daily basis
    • A question on whether I strain the ginger bug before putting it into the ginger ale batch and whether I fill the jar of ginger but back up with water along with sugar and more ginger
    • Thoughts on becoming profitable and selling fermentation equipment and also maybe creating a sponsorship or members section where members could get discounts on fermentation related items from businesses
    • Questions on how long it should be before getting bubbles when making sauerkraut
    • My question to you of did you like this listener feedback segment and should I keep it on the show?
  • Making a basic vegan cashew cheese recipe using rejuvelac and a lot of ideas to alter that recipe and make some killer fermented “cheese”
  • I cover the topic of mold and go through the post of Five Questions on Mold and Food Safety which involve these five questions
    • What is mold and why is there mold on top of my sauerkraut, pickles, etc.?
    • Is it harmful or dangerous to eat mold and what can it do to you?
    • Is it safe to scrape mold off the surface of a brine and then eat the ferment that is below the brine level?
    • Aren’t you afraid of mycotoxins and doesn’t mold have roots?
    • How can I prevent mold from growing on my ferments and what do I do now that I have it?

LINKS FOR TODAY’S SHOW:

I’d love to hear your thoughts on today’s show so be sure to comment below or if you have an idea for the show, email me at paul at fermentationpodcast.com or just click on the Contact button on top of this page and fill out the form. I look forward to hearing from you!

Five Questions on Mold and Food Safety

 Mold what do I do now?

DISCLOSURE: This post may contain affiliate links, meaning I get a commission if you decide to make a purchase through my links, at no cost to you. Please read my disclosure for more info.

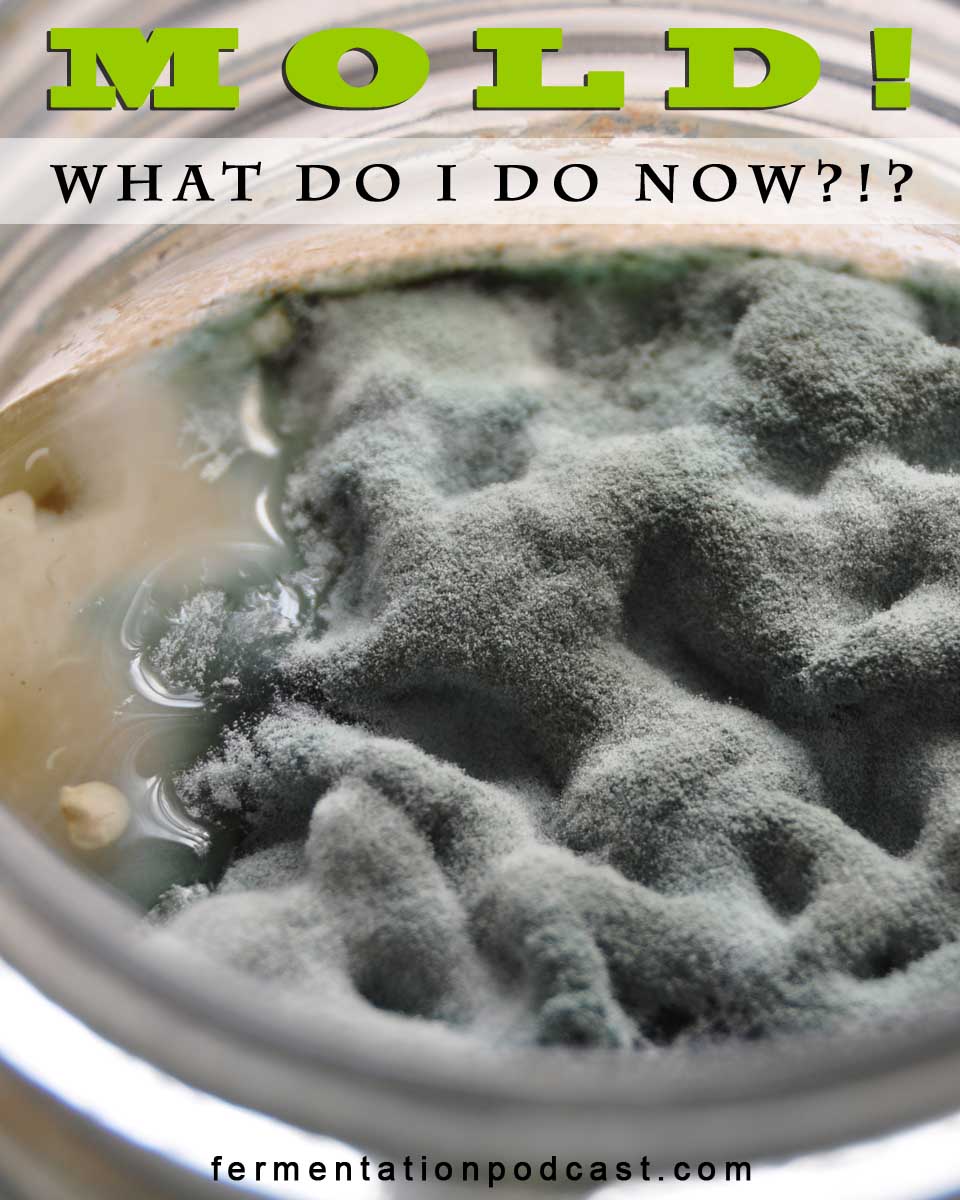
Occasionally I’ll make a ferment, let it develop over a few days or so, pop it in the fridge, and then weeks or months later it’s possible I might see the often-dreaded MOLD on top of my ferment. What do I do?

This is a followup to Mold in My Pickled Peppers and I also go over this in Episode 11 – Listener Feedback, Cashew Cheese, Mold, & Food Safety. Have a listen!

Old mold on pickled peppers

I get questions on mold and food safety like this often:

  1. What is mold and why is there mold on top of my sauerkraut, pickles, etc.?
  2. Is it harmful or dangerous to eat mold and what can it do to you?
  3. Is it safe to scrape mold off the surface of a brine and then eat the ferment that is below the brine level?
  4. Aren’t you afraid of mycotoxins and doesn’t mold have roots?
  5. How can I prevent mold from growing on my ferments and what do I do now that I have it?

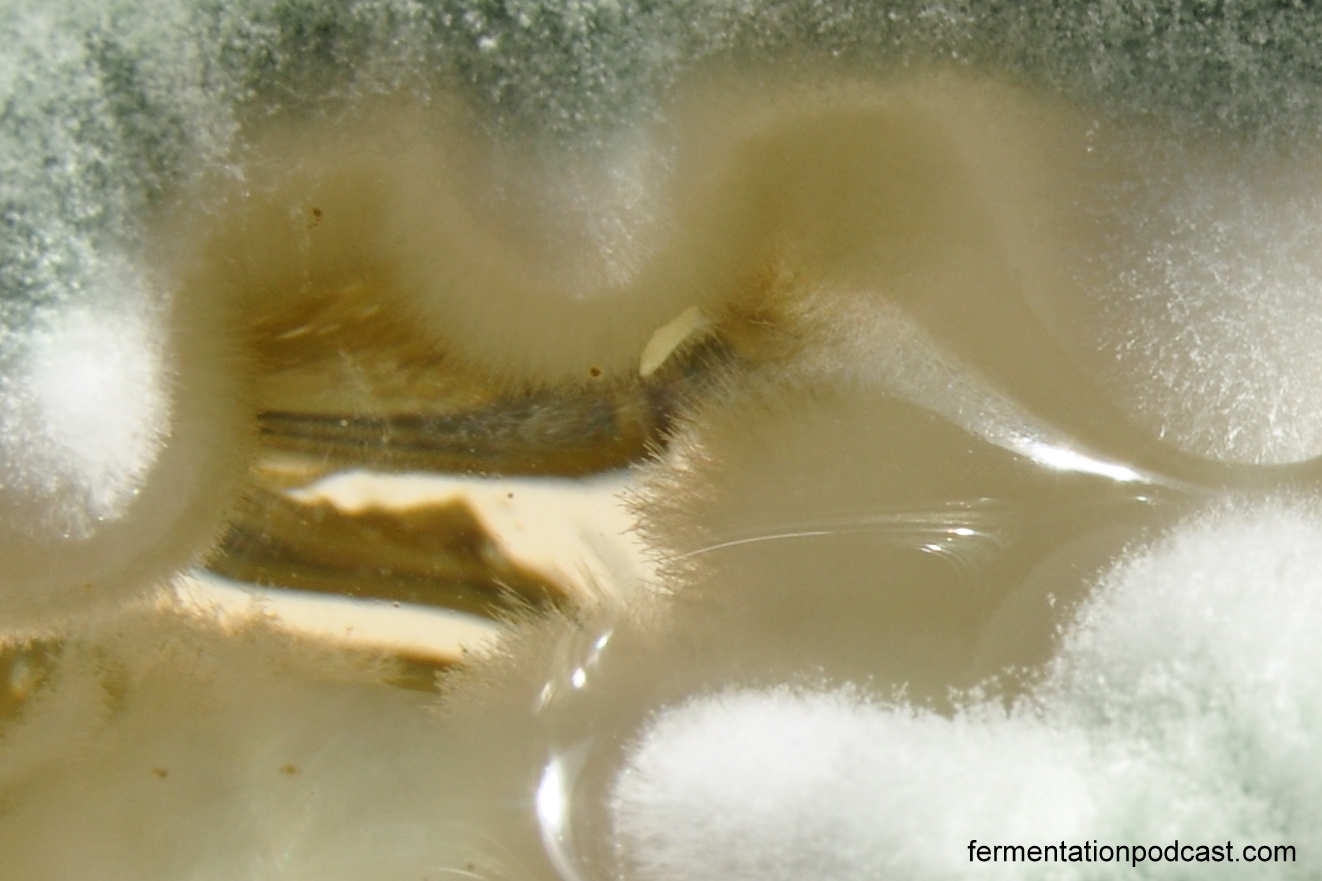
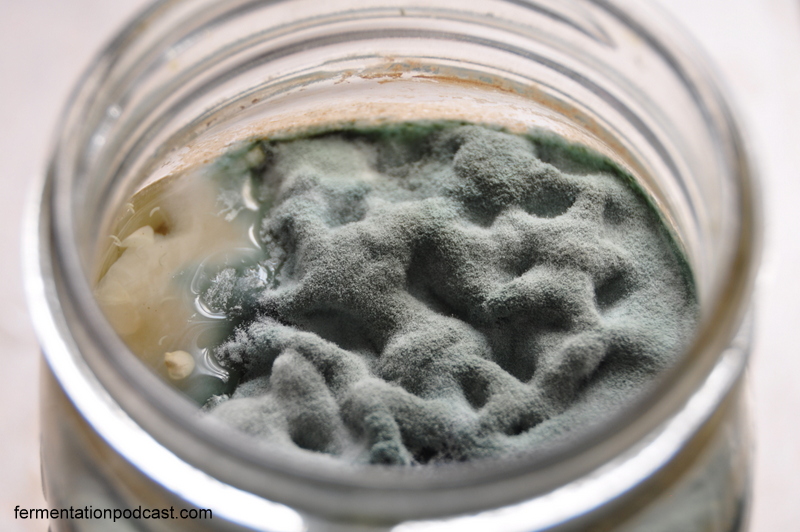
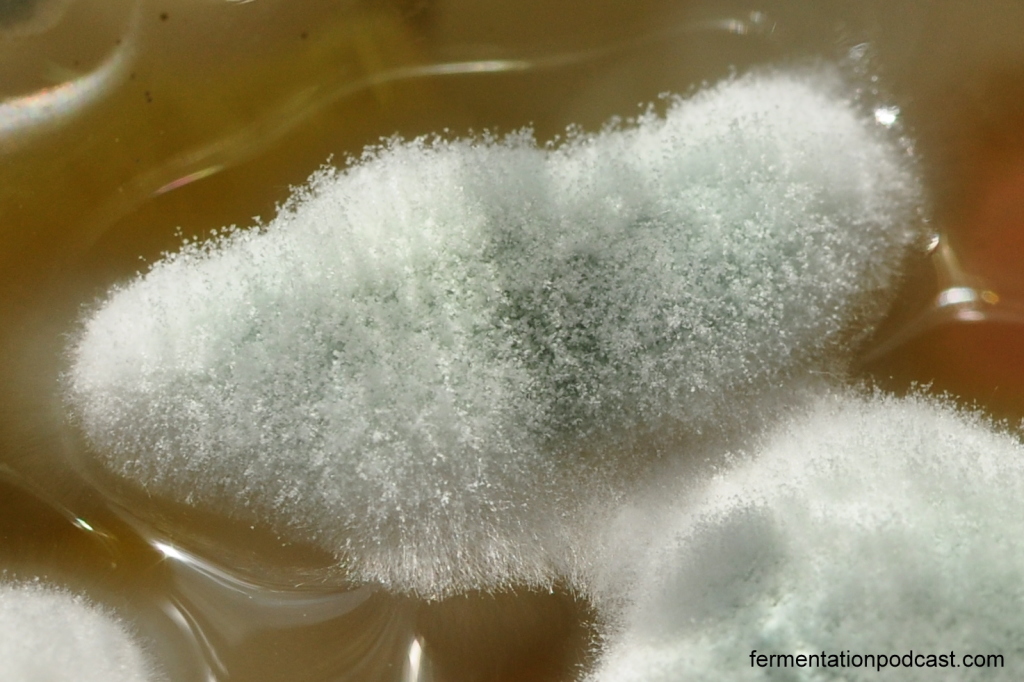
I’ll go over each of these questions one by one and add some pictures to so you can see mold up close and personal. I had one person comment on some of these up close pictures of mold and an interesting thought came to mind that when seen up close, mold is strangely beautiful. I’d have to say that I agree.

Young mold white green close

Young mold white green island

Mold in jar close up

1.  What is mold and why is there mold on top of my sauerkraut, pickles, etc.?

Mold is a fungus organism that grows in filaments that are connected, so it’s a thread-like type of creature that’s multi-celled in contrast to bacteria which is a single-celled organism. The USDA to their credit has a good article about Molds on Food, however they actually don’t cover fermented foods at all and have no comment on surface molds on top of brines.

Mold filaments spores

Mold grows from mold spores that are present everywhere in the air and begin growing when they land on a wet surface that has nutrients (such as your food). They can actually survive in acidic foods so it’s not necessarily the acidity that deters them. Mold spores range in size anywhere between 3-40 microns which is the same size or slightly larger than the size of a red blood cell. The size is important because the naked human eye can see down to 40 microns so only the largest sizes of mold could possibly be seen unaided.

Engineering Toolbox, Wikipedia, and just a general search on Google yields great lists of particle sizes in microns of different things to give you a good comparisons. These range widely but I’ll put an average in the chart below. Here’s a small sample of sizes of particles for reference in relation to mold spores:

Particle Size
(microns)
One Inch 25400
Eye of a needle 1230
Mist (water) 70 – 350
Human Hair 17 – 180
Pollen 60
Mold Spores 3 – 40
Red Blood Cells 5 – 10
Spider Web 2 – 3

NOTE – The human eye is said to have a limit to see down to 40 microns.

There is no reasonable way to eliminate mold spores when it comes to removing them from a human environment so you’re always going to be in the presence of them. They only become a problem when they begin to multiply.

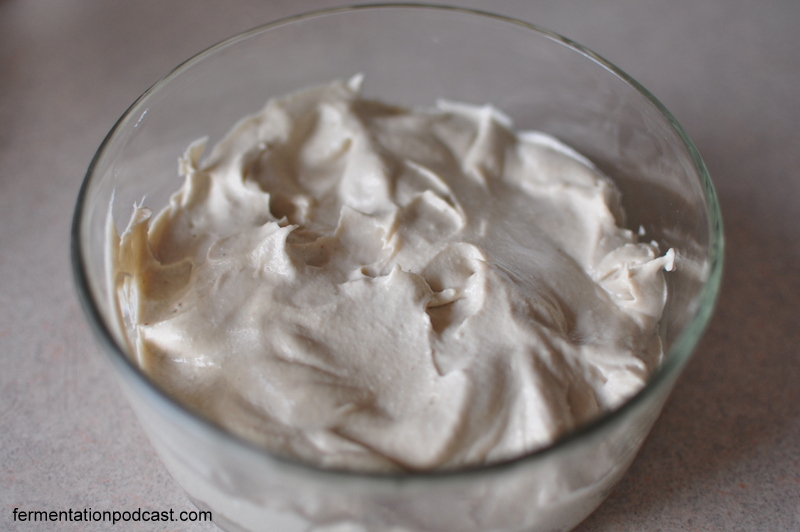
The first question you want to ask though is, do you really have mold or is it harmless kahm yeast?

Kahm yeast is a harmless surface yeast that grows on ferments that haven’t reached a high enough acidity. It’s usually white in color and is almost like a film on the surface. Kahm yeast isn’t dangerous, but it can give your ferment an off flavor so you should remove it to make sure your ferment tastes its freshest.

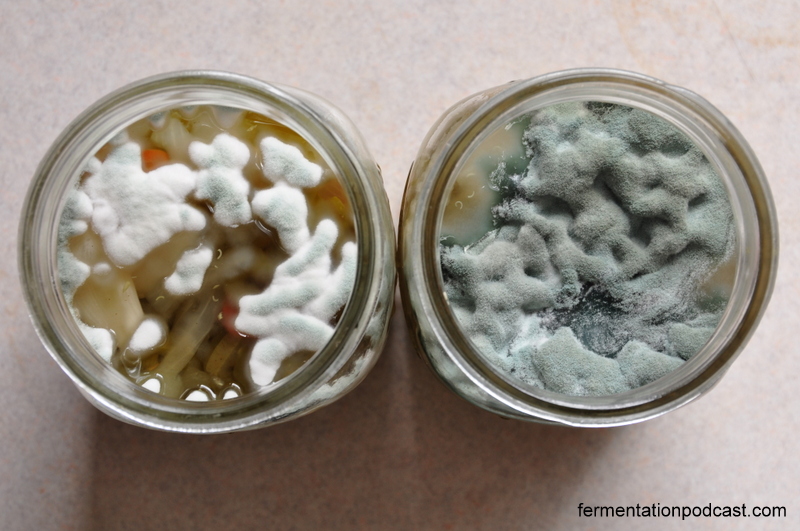
If the stuff growing on your ferment is darker in color or furry then you most likely have mold.

Contributing factors for mold growing on ferments:

  • Keep it below the brine level – vegetables aren’t submerged in their anaerobic environment and are now in an aerobic oxygen environment that mold likes. Using glass fermentation weights or fermentation lids with air locks helps
  • Starting with rotten vegetables – vegetables that are starting to go bad have a higher mold content than fresh vegetables which gives the mold a starting advantage on the other bacteria and yeasts which are competing in the same space
  • Warmer temperatures – the room temperature warms up past the cooler temperatures desired by vegetable ferments warmer than 65-70 degrees
  • Salt – not having enough salt can have a contributing factor
  • Chemicals or pesticides – using water that has chlorine or vegetables that have pesticides could possibly interfere with the fermentation process

2.  Is it harmful or dangerous to eat mold and what can it do to you?

Mold is not something you want to mess around with when it comes to food, but there are also molds that people grow on purpose such as those as you would think of with cheeses like blue cheese.

If you have a piece of food like bread sitting on the counter too long, assuming that it doesn’t contain many preservatives, it will probably start to develop a mold growth. Just like in the ground, once you start to see mold or the fruiting bodies of mold developing on the surface, the mold is well underway in the crevices of that piece of food and is probably already all throughout it.

For food in an aerobic environment it’s probably always the case that these should be thrown away because of the health consequences that it can have on you.

Molds have three methods in which can make people sick and eating mold can have any of these side effects:

  1. Infection of the person – this is an actual infection of the mold onto the person such as athlete’s foot, and also is much more uncommon unless a person has a severely reduced immune system.
  2. Allergic reaction – this is where a person is allergic to the actual mold or mold spores (which is either inhaled or absorbed through the skin).
  3. Chemical toxicity (mycotoxins) – these are the chemicals or small molecules of toxins formed by the hyphae of molds (the filaments that connect them) that can have severe chronic and acute health effects on your body. These are sometimes inhaled but more often usually consumed through food.

There are people who accidentally eaten mold such as a piece of bread that was moldy and haven’t gotten sick. Most likely the extreme pH of the human stomach at 1.5 to 3.5 probably destroyed the small amount that would have done them harm, or they could have gotten lucky with a type that wouldn’t have gotten them sick. The CDC says that there could be anywhere between tens of thousands to hundreds of thousands of different types of fungi.

Dealing with the effects of mold on your body can take quite a long time to get over so if you have any food that has mold on it in an aerobic environment, my advice is to throw it away and not consume it.

When dealing with food that is in an anaerobic environment, that might be a slightly different story as I’ll explain below, but everyone should come to their own conclusions and be responsible for their own actions.

3.  Is it safe to scrape mold off the surface of a brine and then eat the ferment that is below the brine level?

When going through this question, I can only answer for myself as to what I do and I’m not advising anyone to consume a ferment that has mold. There are people that have severe allergic reaction to molds, mold spores, or the toxins (mycotoxins) that the mold filaments produce, so each person has to decide what’s appropriate for them.

However, much more research and factual evidence including pictures and data on a microscopic level needs to be done in this area as there is too much conflicting advice, hearsay, and not enough science to put this to rest.

Here are some thoughts that I follow myself though:

  • As far as anecdotal advice that seems to hold up, in Sandor Katz’s book The Art of Fermentation and Wild Fermentation, he specifically says that if you have a ferment in a brine and the vegetable matter is below the brine, you can safely scrape the mold off the surface of the brine and consume the ferment.
  • He also says that if you have pieces that have gone above the brine level and have molded, simply cut those off, thrown them away, and the rest below the brine level is fine.
  • I feel (for myself) that if a brined ferment has a little mold, I’ve scraped the mold off the surface, cut off molded pieces or toss them entirely, and the ferment underneath the brine has been fine for consumption and I’ve have never had a problem as well as I’ve heard the same from many others.
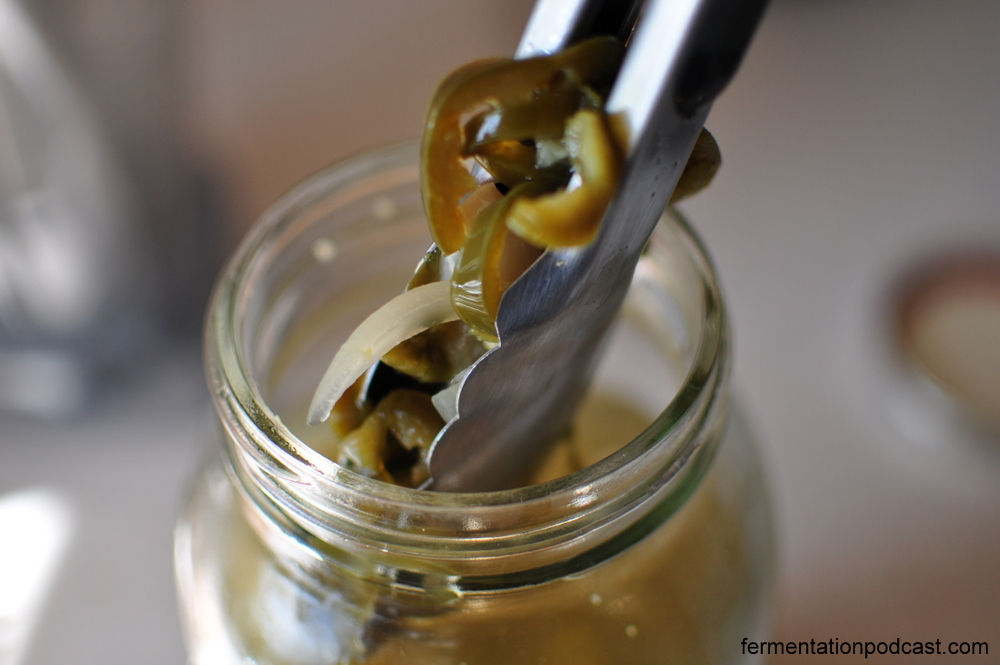
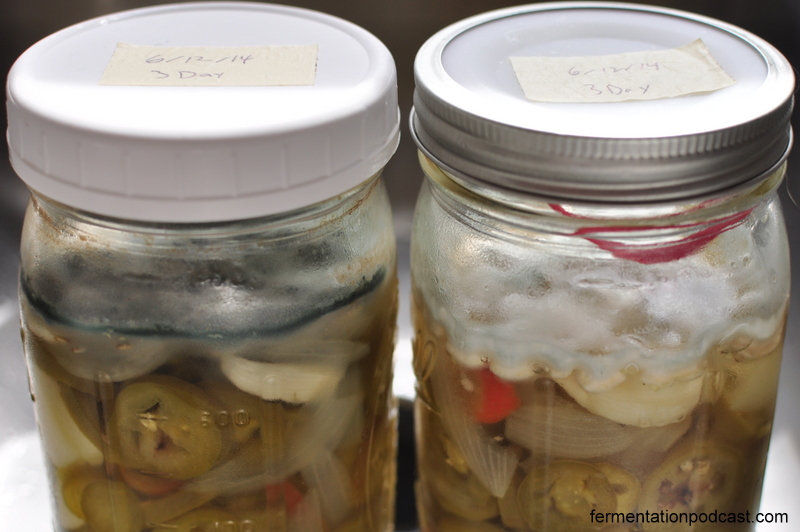
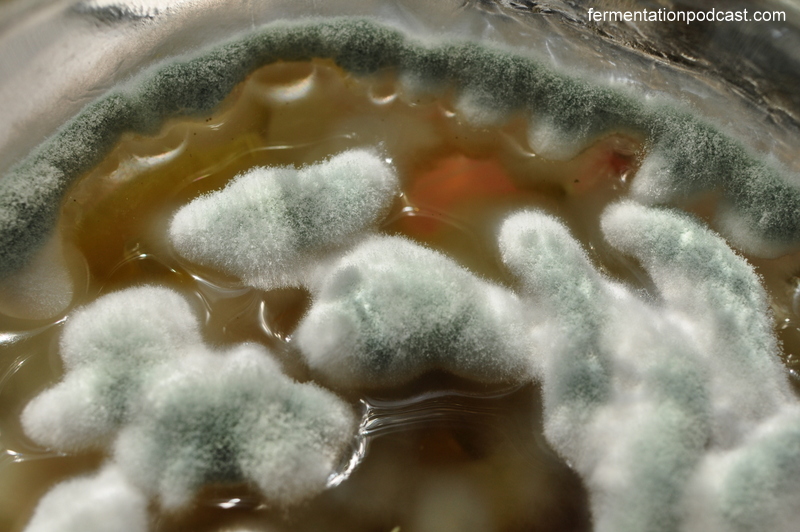
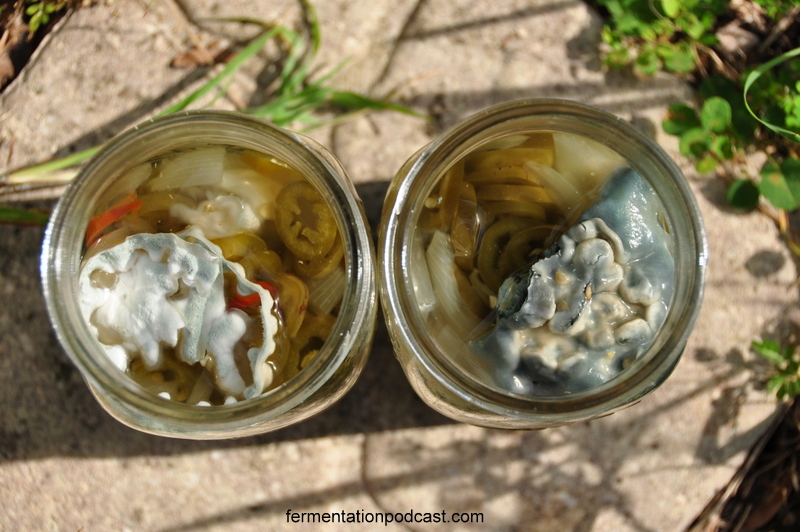
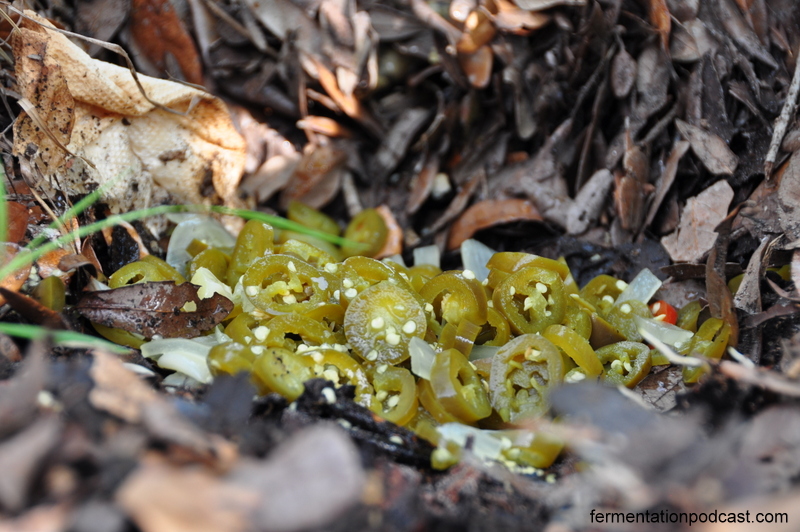
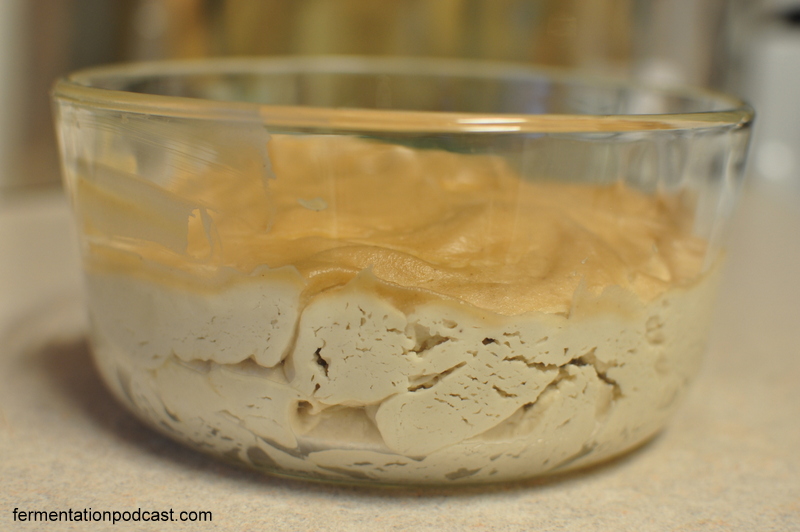
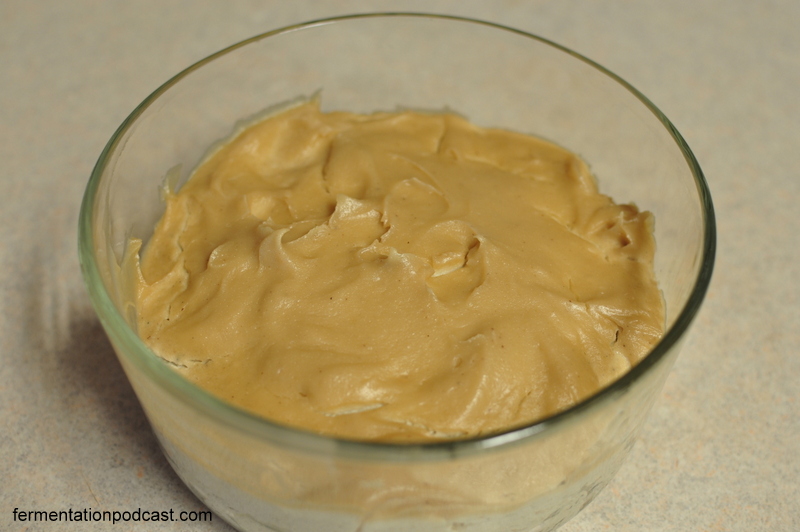
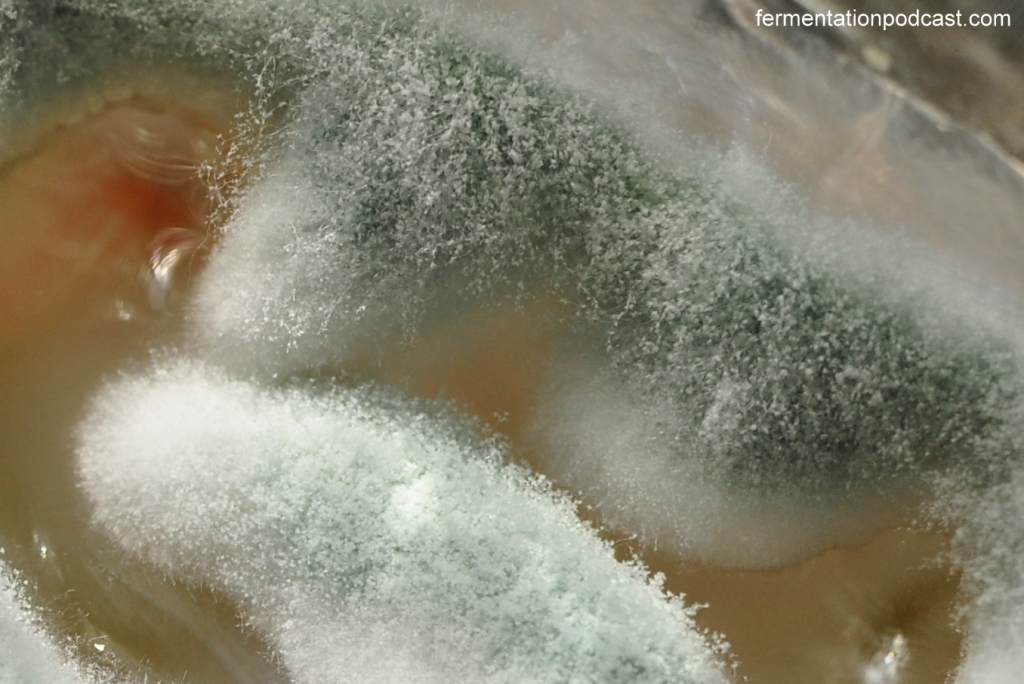
  • There have been occasions, such as the pictures on this page, where there has been a substantial amount of mold covering the surface, so I tossed everything out and started over. Like I’ve said before, there’s always the next batch.

4.  Aren’t you afraid of mycotoxins and doesn’t mold have roots?

In terms of mycotoxins, I have never had any adverse reactions to simple vegetable ferments and I am not worried about this in the slightest.

Often you’ll hear the argument, “But mold has roots which means it’s deep into the entire batch so the whole batch should be thrown out.”

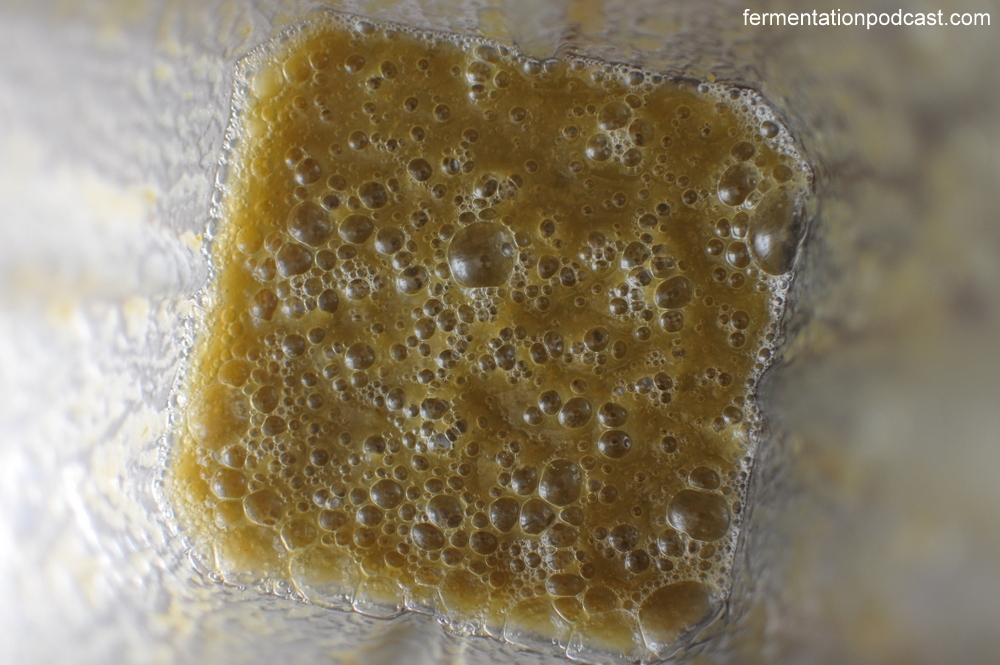
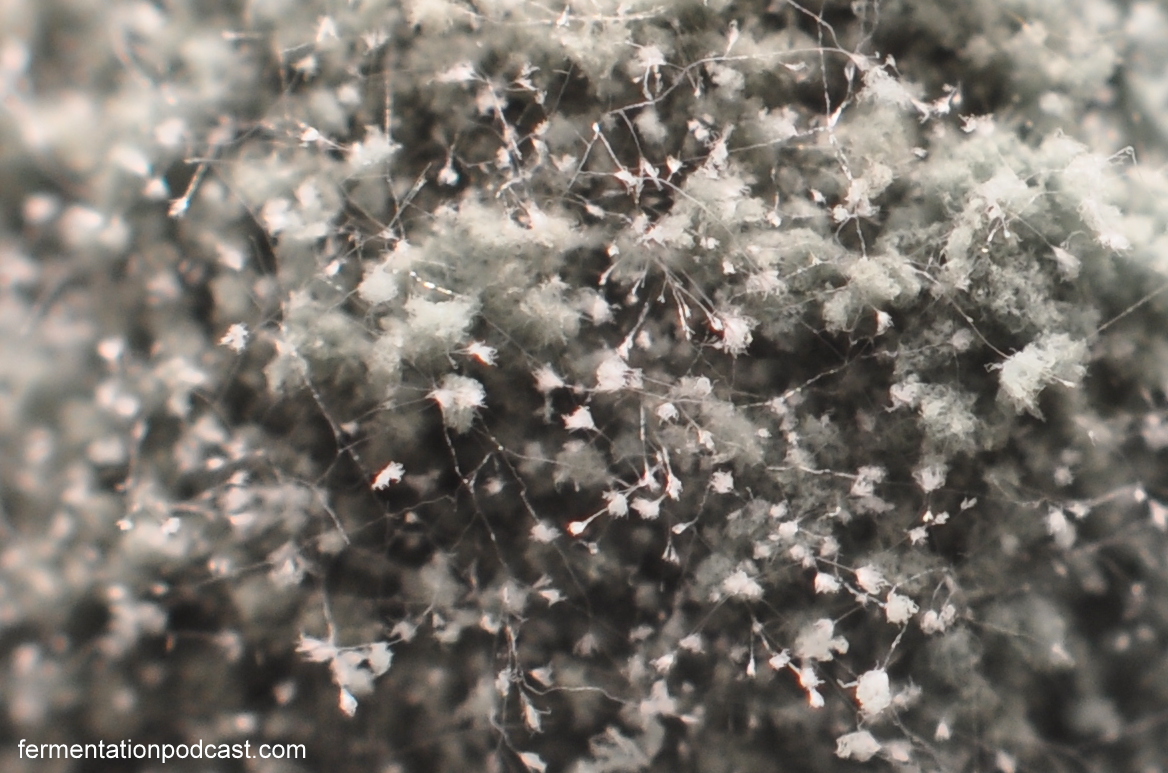
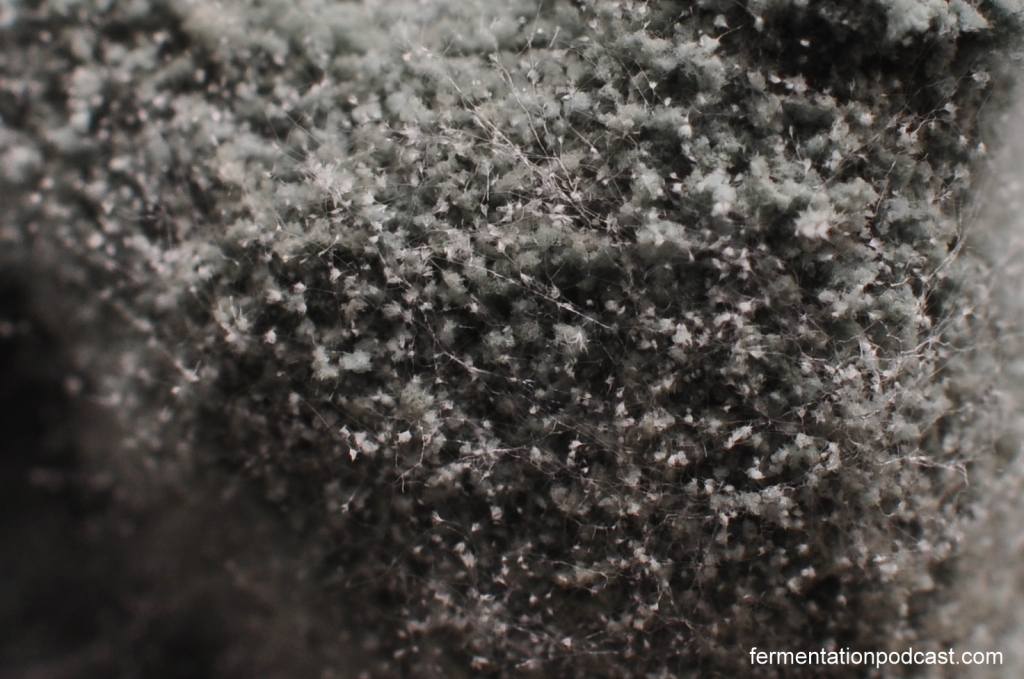
When you look on the surface of a growing mold, there’s an enormous amount of fruiting bodies that create the mold spores that then cause the mold to spread through the air. At the same time, if you magnify it enough, you can see the filaments of the hyphae that connect the mold cells together which helps mold spread over a surface.

Mold hyphae fruiting bodies

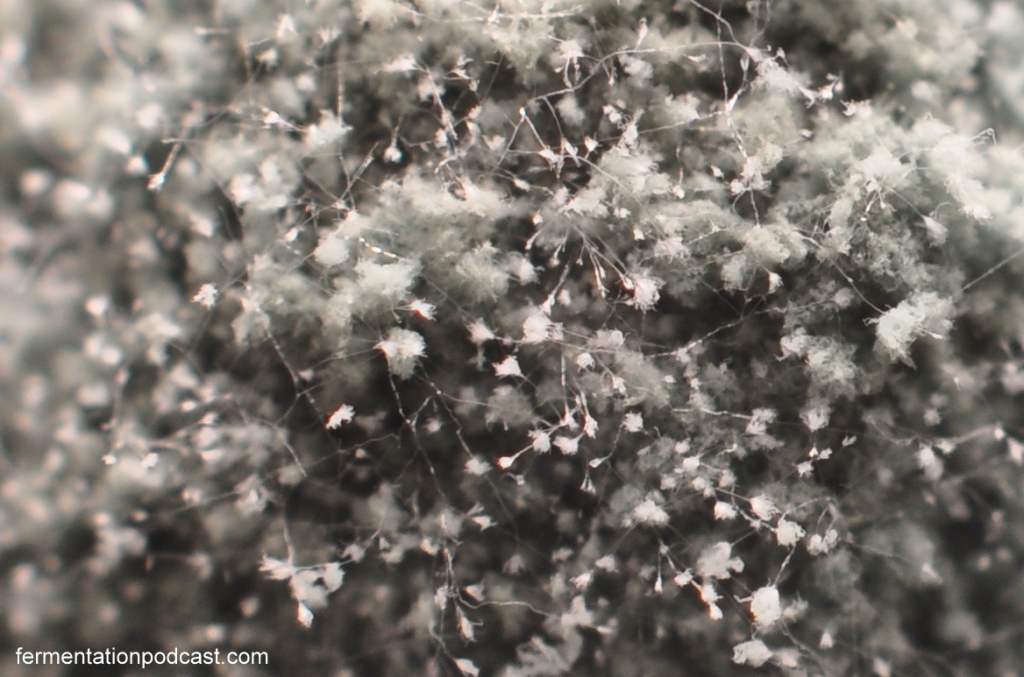
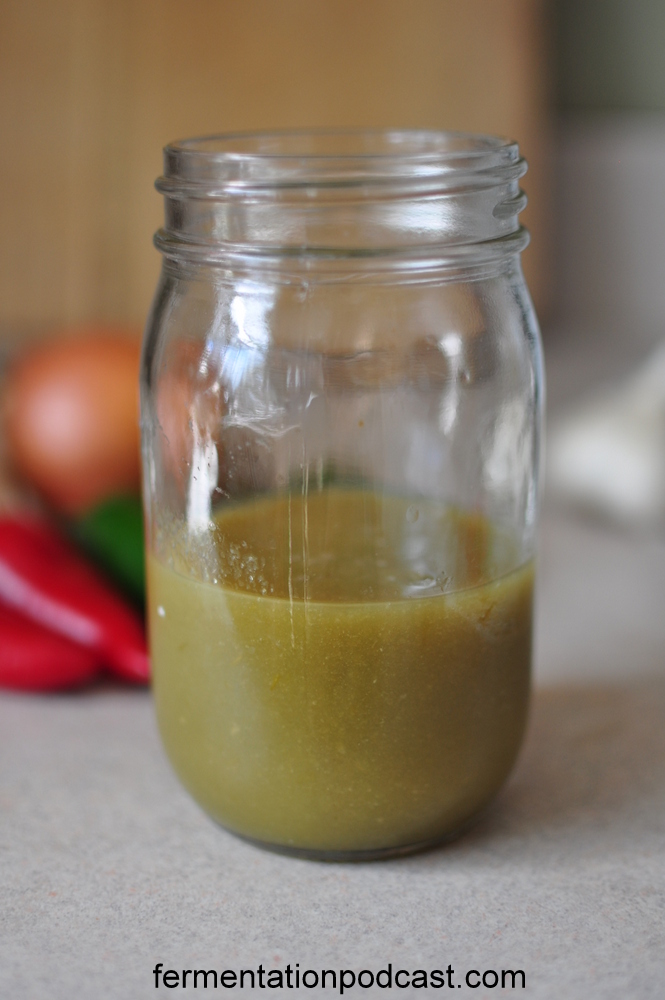
I’ve gotten macro photographs of mold up close and personal and I mean within 1 mm from the lens where I couldn’t get any closer than that unless I got a microscope and when I’ve looked under a mass of mold, I haven’t seen these roots myself. I expect not to be able to see them with my naked eye since it’s beyond the eye’s capability, but with my camera gear I expect to see them and I haven’t.

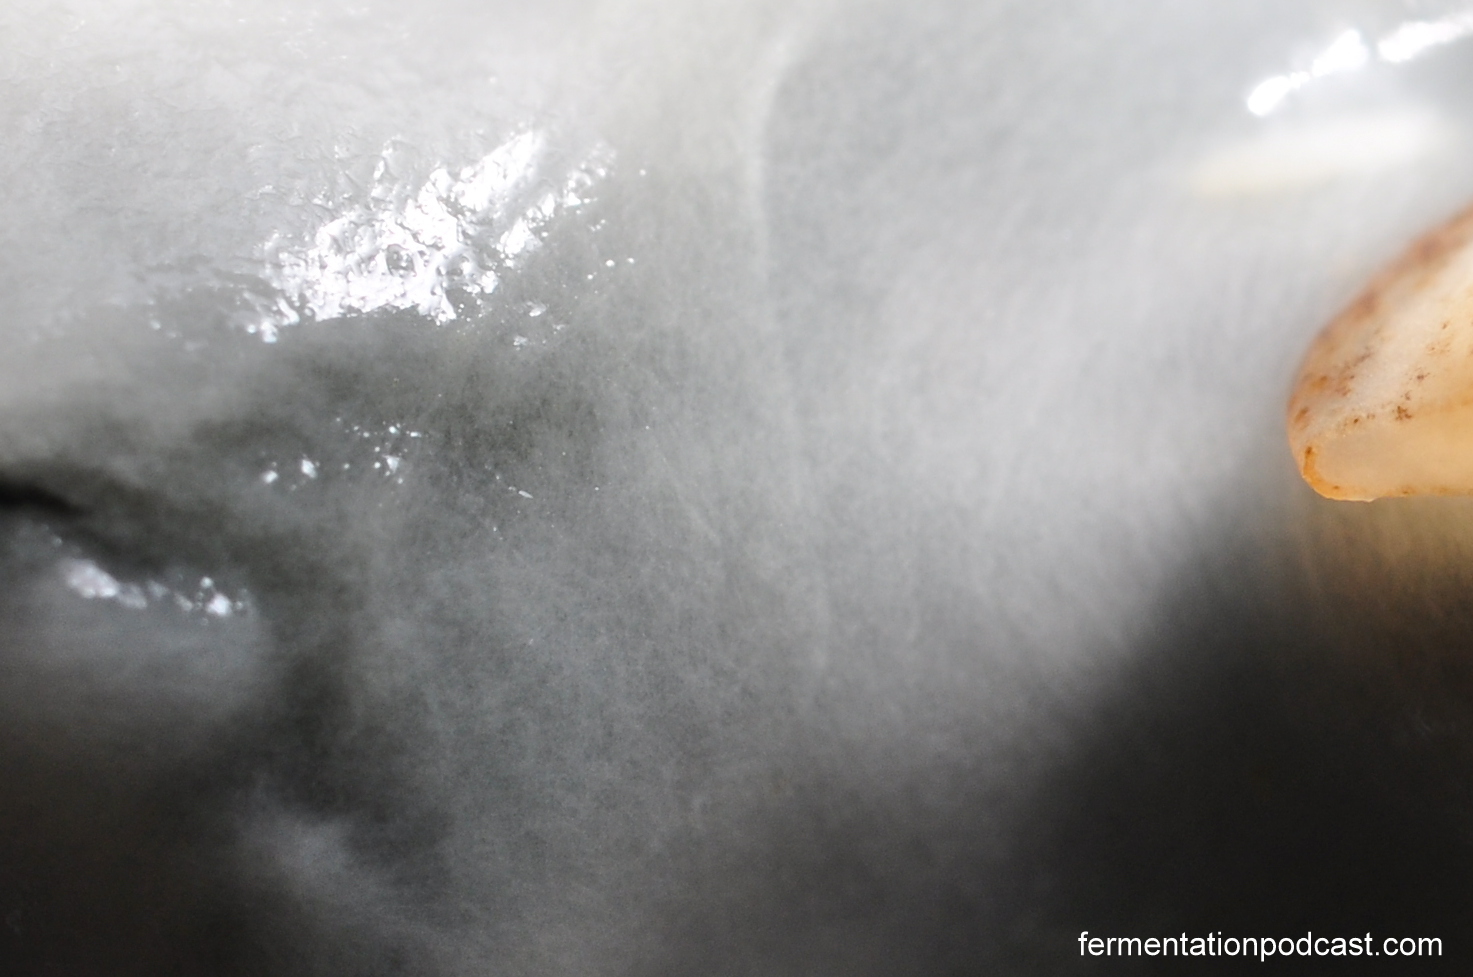
I’ve seen young mold that starts to grow and some of the filaments are below the brine surface, but as the mold gets older, those filaments are no longer visible and possibly die off.

Young mold underwater

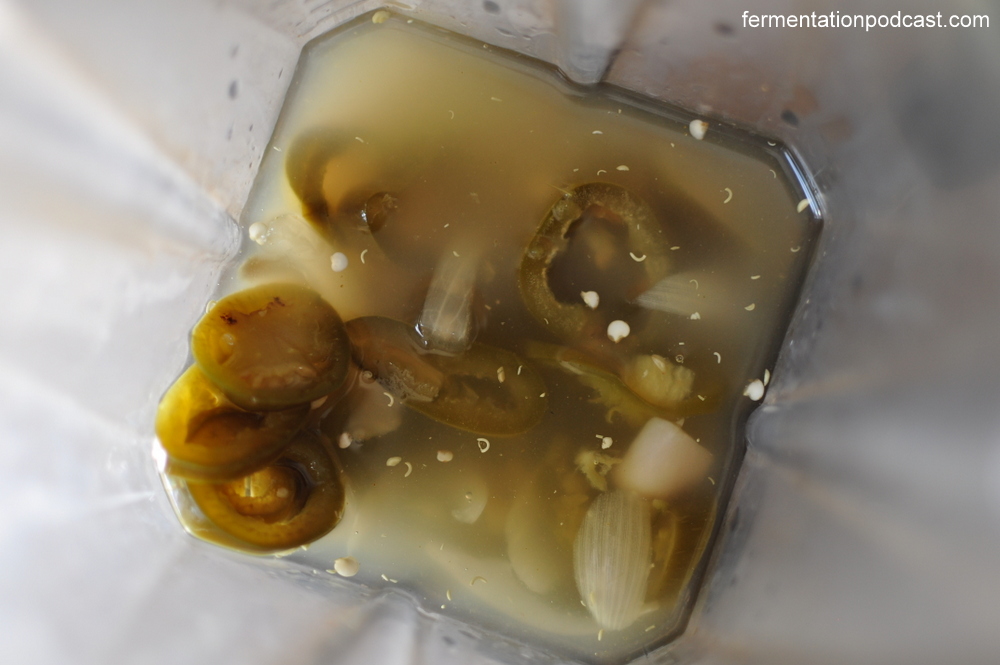
I took the older mold, carefully flipped it over, and it looks like a solid mass with no roots in the actual brine.

Mold underneath

Mold bottom close up

(For reference, that slightly tannish-brown object on the right is a jalepeno pepper seed)

I think more people need to get involved in this research and either solve this once and for all or point to actual credible scientific evidence with pictures – and when I mean evidence, I’m talking about evidence of roots of mold growing down from the aerobic surface of a brine into the anaerobic brine, which I’m not convinced that it does.

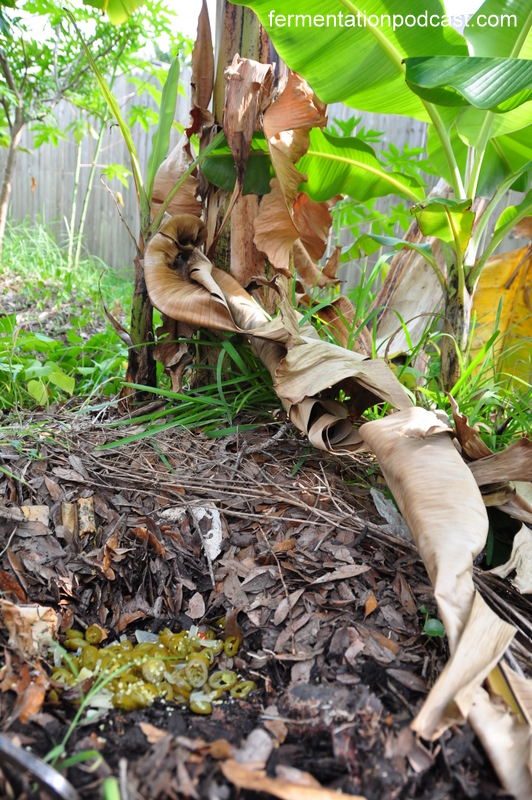
From my experience in permaculture, the fermentation process locks up harmful toxins in the environment, which is natures way of cleaning things up. This is seen in a compost pile where toxic chemicals are either

  • broken down into less toxic substances
  • or locked up in the carbon of plants from the fermentation process rendering them inert

It’s possible that the anaerobic process of lacto-fermentation deactivates or locks up these toxins in mycotoxins. I think this would make a great science fair project for a student and encourage some experimentation

5.  How can I prevent mold from growing on my ferments and what do I do now that I have it?

The best way to deal with mold is probably not to encourage it in the first place and you can do that by making it less hospitable for mold to grow.

Some ideas on this include:

  • Create an anaerobic environment – keep the oxygen out of the container by using any of the following:
    • the time-tested method of a fermentation crock with a water moat which burps out CO2 and prevents oxygen from entering the fermentation vessel (like a ceramic crock)
    • a mason jar with an air lock or fermentation lid (or something like a Pickl-It)
    • or just trying as much as possible to keep the brine surface as small as possible (like putting a jelly jar inside of a larger wide mouth jar
  • Use fresher vegetables – rotten vegetables are already going to have a higher mold content
  • Ferment in slightly colder temperatures – find a cool place in your house, for people in a cooler environment use your root cellar, create a temperature controlled container like a cooler with cold water, etc.
  • Use more salt – it might give your ferment a slight edge with a bit more salt, try it and see

If you already have a mold infestation, you have a few options and these are highly personal so decide for yourself:

  • Use the old adage “When in doubt, throw it out” which is perfectly acceptable! Just try again.
  • Skim the mold off the top and don’t worry about it
  • Skim the mold off the top and try and create a more anaerobic environment for your ferment, and ferment a little longer

Moldy pickled peppers side by side

That’s really it. If you’re tossing the whole batch and want to make sure to get rid of the mold that might still stick around the dry parts of your container, scrub with soapy water, vinegar, and if you need like Mark Campbell suggests with ceramic crock weights, put them in the oven on very low for a while to “cook” the mold to destroy it.

I hope you’ve enjoyed this post and if you do happen to get some mold in your ferments, don’t feel bad!  It happens to all of us and it’s just part of life’s natural processes.  Mold plays a very important part in nature and I’d rather have food that can grow mold on it rather than having food that could sit on the counter for years and look just as fresh as when you first buy it.

Leave me some comments and happy fermenting!

Mold in Pickled Peppers

Moldy pickled peppers side by side

I have mold in my pickled peppers! Surprisingly, I was actually very excited about this turn of events because I got to break out my camera’s macro lens accessories and get some pictures to see what’s going on up close.

I go over this and follow up in Episode 11 – Listener Feedback, Cashew Cheese, Mold, & Food Safety (Have a listen!) and my post Five Questions on Mold and Food Safety.

Moldy pickled pepper jars

I looked in the second fridge and noticed what appeared to be colors other than the pale yellowish-green that I’m used to seeing with my pickled peppers.

Since I’m documenting all of my wins & fails in fermentation, I’ll occasionally make posts like this showing what can happen to a ferment when it gets mold, what it looks like, and what my verdict for what I did myself was:

What’s the verdict?

Do I scrape it off and eat the batch anyways?

Or do I follow of the golden rule: “When in doubt throw it out.”

Young mold on pickled peppers

You can see the mold above is a slightly younger that was just beginning to form and still had white areas that were beginning to turn green.

Old mold on pickled peppers

This mold was a bit older and more mature, forming more of a solid carpet on the entire surface and all dark green.

I’ve pickled jalepeno peppers quite a few times over the years in the same exact manner with the small jelly jar inside the larger quart jar. The strange thing is that I’ve NEVER had mold yet from any batches of pickled peppers and this is the first one to grow some of this fuzzy stuff (not harmless kahm yeast, but actual fuzzy mold) and not in just one jar, BOTH!

This actually leads me to believe that either:

  • I didn’t ferment it long enough (which I don’t think is the case because it was fermented the same amount of days at the same normal temperature as always)
  • Or, that this batch was possibly susceptible to begin with

I can tell you to start with that one of these jars in the past month actually did have a tiny bit of mold that was less than the size of a dime and I just scraped it off. If it’s a small amount, for myself, I’m not that worried about a tiny bit of mold, so sometimes I do just skim it off and go on with my life.

But for an occurrence like the one you see above off with the amount of mold that was on it, drum roll please!

Moldy pickled peppers outside

VERDICT: Feed the moldy peppers to my banana trees as compost!

Pickled peppers compost

Pickled peppers compost bananas

Now it’s very possible that Sandor Katz would say that this is still safe to eat, and that might possibly be true, but my personal comfort level told me to just throw the whole thing out.

It does bring up the interesting question to begin with though of why would this batch get moldy and not any of the others? And also, why did both jars get it? Maybe the mold spores already existed on these peppers and they just had a higher likelihood. In any case, I’ll be making a post coming up about mold and food safety and what my personal habits are.

The advice I’d always tell all my listeners and readers though is, you have a responsibility to figure out what comfort level you have when it comes to mold, and if you feel you have a doubt, don’t hesitate to throw it out!

You can always make another batch and tomorrow holds a whole new set of fermenting possibilities.

In any case, I have one happy bunch of bananas!

Happy banana bunch

I’ll have an upcoming post on mold and food safety and if you thought these pictures were up close and personal with our fuzzy nemesis, you haven’t seen anything yet!

Basic Vegan Fermented Cashew Cheese Recipe

Basic Vegan Fermented Cashew Cheese Recipe

How would you like an amazingly flavorful, slightly funky, fermented cheese recipe made of cashews that also happens to be vegan? What if I also said that with time, this would be a cheese you could slice like artisan cheese or grate like Parmesan?

I wasn’t sure what exactly I was making when I started this new adventure but I had an idea that this technique perfected by Miyoko Schinner of the cookbook Artisan Vegan Cheese would end up being very interesting.

Check out the full video and be sure to subscribe to our YouTube channel. We appreciate your support!

A few posts back when I had given out the rejuvelac recipe, what I was actually doing is making the precursor to what would become a nice, flavorful, non-dairy cheese log.  The secret to the funkiness lies in the rejuvelac (sprouted grain drink) which ferments the blended cashews into a tangy ball or log (however you’d like to shape it) of goodness.

This fermented cashew cheese can be used in several different ways. It starts off as what could be considered a cheese dip, then moves on to a slightly more solid state but with a center that’s soft like a brie, and then finally with enough time turns into a solid mass very reminiscent of a cheese log or a cheese wheel if you desire to shape it that way.

I brought this to a family gathering, set it out on a wood platter with a knife, and surprisingly it took the place of a traditional gourmet cheese very well being served on bread or crackers. The kids weren’t so sure about it but most people who tried it found it very good with that deep cheesy flavor.

I could definitely imagine making more interesting flavors with this basic vegan cheese recipe like maybe some of the following other ingredients:

  • chopping up some of my lacto-fermented hot peppers and tossing them in for a pepper jack
  • chopped sun-dried tomatoes and herbs
  • minced garlic
  • olives
  • miso paste
  • onions
  • other chopped nuts like walnuts
  • chopped dried fruit like apricots or cherries
  • citrus rinds
  • cacao nibs

Herbs or spices that you could add to this recipe could maybe include:

  • Italian herbs like oregano, basil, or thyme
  • dill could add an interesting zing to a fermented cheese the way it does with pickles
  • parsley
  • chives
  • rosemary
  • paprika
  • cumin
  • cracked black pepper
  • crushed red pepper

Other interesting ideas to change the way this cheese behaves on the tastebuds could be:

  • liquid smoke to make a smoky cheese
  • for more of a presentation, you could roll the cheese log or cheese balls in herbs, cracked pepper, or sliced nuts like almonds or seeds
  • fermenting the cheese with sauerkraut juice or another brine instead of rejuvelac
  • fermenting the cheese with yogurt instead of rejuvelac
  • trying rejuvelac recipes made with several different types of grains
  • apple cider vinegar
  • Dijon mustard
  • carrots for color
  • turmeric for color
  • coconut oil for a different mouthfeel
  • trying changing the cheese base of cashews to almonds to experiment with different bases

Inspiration for other ideas could come from this post on Buzzfeed that had inspired me to look into vegan cheeses, 14 Vegan Cheeses That Will Make You Forget About The Real Thing. The pictures in there is what will really get you going among so many others that you can find on Pinterest, but hopefully this will get you started!

Basic Fermented Cashew Cheese

Makes 1 small log or several cheese balls

I consider this a basic cheese recipe made from cashews and fermented with rejuvelac (sprouted grain beverage) that could be altered and added to with any number of ingredients to make it how you’d like. Serve with crackers or bread in the same way you’d serve a gourmet cheese at a party, and for more presentation, roll in herbs or cracked pepper.

Equipment:
Blender
Ceramic/glass container or bowl

Ingredients:
2 cups cashews, soaked 30 minutes or so
1/4 cup rejuvelac (wheat, rye, millet, quinoa, barley, etc.) *rye makes the best tasting
1 tsp. sea salt
1 T. nutritional yeast
1 tsp. lemon juice

Soak cashews for 30 minutes or so and they’ll soften up a bit for a creamier blend.

Soaked Cashews

Blend soaked cashews, rejuvelac, and salt to a paste (a Vitamix makes this a breeze) and scoop into your container.

Cashews in Vitamix

Blended Cashews & Rejuvelac in Vitamix

Vegan Cashew Cheese Dip

Cover container and let sit at room temperature for 1-2 days depending on how tangy you like it. Taste to check. The top will crust and become hard.

Fermenting Vegan Cashew Cheese

Vegan Fermented Cashew Cheese

Stir in nutritional yeast and lemon juice and combine completely.

Nutritional Yeast

Stir in Nutritional Yeast Cashew Cheese

If you want a dip, you’re done or you can let it ferment longer to get tangier.

Stir Ingredients into Cashew Cheese

If a cheese log or cheese balls are desired, spoon into a large square of wax paper, fold over the edges, and twist off the ends to close it up and form into a log. This is a little tricky so don’t feel bad if it’s not perfect.

Vegan Cashew Cheese Log Setting

Store in the refrigerator to set for 1-2 weeks. After about 1 week it will have a slightly soft center and tricky to slice. After 2 weeks it should become more solid and much easier to slice. If you let it set longer, you could probably grate it like Parmesan.

Basic Fermented Cashew Cheese Recipe

Serve with bread, crackers, or alone for a tasting!

Making a Salt Brine & Calculating Salinity for Brine Recipes

Calculating Salt Brine Ratios for Fermentation Recipes

DISCLOSURE: This post may contain affiliate links, meaning I get a commission if you decide to make a purchase through my links, at no cost to you. Please read my disclosure for more info.

To go along with yesterday’s podcast, Episode 10 – Types of Salt, Brine Basics, and Weight Ratios in Fermentation, I decided to do a writeup showing you how to make a salt brine for fermentation and fermented vegetables. There are several methods for creating a salt brine recipe and calculating how much salt to use, and I’ll go over the three methods I mentioned in yesterday’s show.

Don’t forget to subscribe to our YouTube channel. We appreciate your support! Here’s one of our favorite recipes:

Starting off, here’s what I was talking about when I mentioned that there are several different types of salt to consider when fermenting foods and making brines.

Types of Salt to Know for Fermentation Salt Brines

Table salt – NaCl (sodium chloride) – this is your average table salt that everyone knows that you’d have in a salt shaker at home or get at a restaurant

  • it only has 2 minerals – sodium and chlorine
  • it has a fine grind so smaller particles
  • it also usually contains anti-caking ingredients

Iodized table salt – this is table salt that has iodine added to it along with anti-caking ingredients

  • it also only has 2 minerals – sodium and chlorine
  • it has a fine grind so smaller particles
  • it also usually contains anti-caking ingredients
  • The reason iodine was added back in the 1920’s was that people were starting to get iodine deficiencies. Iodine deficiency causes goiters, which is a swelling of your thyroid gland in your neck. Iodine deficiency was and still is a major cause of mental retardation in the world so when the government forced salt companies to include this, it actually did help alleviate the iodine deficiency problem.
  • You don’t want to use iodized salt in fermentation not only because of the anti-caking ingredients, but because the iodine that’s added can react to the ferments causing dark colors.

Pickling saltthis type of salt is marketed for people making pickles and for canning

  • it also only has 2 minerals – sodium and chlorine
  • it has a fine grind so smaller particles
  • his type of salt does not contain anti-caking ingredients so it can have a tendency to cake or clump together
  • this is okay for fermentation but there are healthier salts you can use

Kosher salt – this type of salt was made for religious reasons to extract blood from meat to adhere to Jewish law

  • it also only has 2 minerals – sodium and chlorine
  • it has a much coarser grind so there’s larger particles
  • this type of salt does not contain anti-caking ingredients but doesn’t suffer from clumping because of the coarser grind
  • this is also okay for fermentation but there are healthier salts you can use

Sea salt – originates from the sea or mineralized water. This is what I prefer and no particular brand in general. Even better is iodized sea salt. Could contain 80+ more minerals than table salt but it really depends on where the sea salt was obtained and it can vary

  • it usually contains several major minerals in addition to sodium and chlorine like potassium, phosphorus, calcium, sulfur
  • trace minerals in sea salt can include iron, iodine, manganese, zinc, bromine, boron, copper
  • two methods of making sea salt
    • Mining from ancient salt beds – this method could possibly be more pure
    • Evaporating mineralized water like that from the ocean, sea, lakes, or ponds – this method could possibly concentrate toxins

Fleur de sel or “flower of salt” – a type of salt that is made by evaporating sea, lake, or spring water in evaporation ponds or pans and collecting the young salt that forms on top of the water

  • contains numerous minerals like any sea salt would
  • can be used for fermentation, but is more expensive and probably not worth the extra cost
  • better for fine cooking

Sel gris or “grey salt” also known as Celtic sea salt – it’s grey in color is harvested the in same way as Fleur de sel is by harvesting evaporated sea, lake, or spring water except sel gris is the salt that has sunk to the bottom and is then raked and collected

  • contains numerous minerals like any sea salt would
  • can be used for fermentation and is probably one of the more popular sea salts available
  • good price for how much you get

Pink Himalayan salt – this salt is harvested in Pakistan which is part of the Himalayan mountain range and the pink color is due to the salt containing iron oxide (which is rust)

  • contains numerous minerals like any sea salt would
  • can be used for fermentation, but is more expensive and probably not worth the extra cost
  • better for fine cooking
  • probably one of the more pure salts since it’s mined from ancient sea beds

Black salt (also known as Kala Namak)this salt is a pinkish gray and is mined in India and has a strong sulfuric smell. It’s mostly used in Southeast Asian cooking but vegan chefs have also been using it to give an eggy flavor to their cooking

  • contains numerous minerals like any sea salt would
  • can be used for fermentation, but is more expensive and probably not worth the extra cost
  • better for fine cooking with the twist of having a sulfuric smell
  • it might give ferments a strange sulfur aroma

Hawaiian sea salt – it can be fine or course and can be red or black. The red Hawaiian sea salt gets its color from a natural mineral called Alaea which is a volcanic baked red clay. The black Hawaiian sea salt gets its black color from the charcoal in it

  • contains numerous minerals like any sea salt would
  • can be used for fermentation, but is more expensive and probably not worth the extra cost
  • better for fine cooking

Other types of salt – several other types exist like smoked salt, seasoned salt, flaked salt, just to name a few

Calculating Salinity Percentage for Brine Recipes

Calculating Salinity % by Weight

  • Use a kitchen gram scale to weigh everything
  • Take the weight of the water or vegetable matter (if you’re sweating vegetables like cabbage) and multiply by the % salinity you’d like
  • Example 1: You need 1 cup of brine to cover your vegetables and you want a 2% salinity
    • Weigh your water in grams (1 cup of water weighs about 236 grams)
    • Multiply 236 x 0.02
    • You need approximately 4.72 grams of salt (so you could round it down to 4 or up to 5)
  • Example 2: You’re making sauerkraut and want to know how much salt you need for 1 1/2 lbs of cabbage and a 3.5% salinity
    • Covert 1.5 lbs to grams which is about 680 grams
    • Multiply 680 x 0.035
    • You need approximately 23.8 grams of salt (so you could round it down to 23 or up to 24)

Here’s a general guide that you can use as an estimate but don’t forget! All salt weighs differently so you’ll have to experiment with this until you find what you like.

Calculating Salt Brine Salinity Percentages for Recipes

Calculating Salinity % by Volume

  • Find a salt level you like per cup of water
  • For example, for pickles, I like 3/4 tablespoon of salt per cup of water (this will make very salty pickles for sandwiches, you might like less)
  • Scale this up for bigger batches
  • Figure out what you like for other recipes, for example for pickled peppers I like 1 teaspoon per cup of water) and scale that up
  • Don’t forget that different salts weigh different amounts

Calculating Salinity % by Taste Test

  • Put your vegetables or whatever you’re fermenting in the jar, pour in your water, add a little salt, stir to dissolve, taste, add a little more, stir to dissolve, taste and so on.
  • I preface this by saying this method is more for the safer ferments like vegetable ferments, not for riskier ferments like meats.

General Rules of Salinity Ratios

Here’s some general rules to keep in mind when you’re figuring out what salt level to use in your fermented food recipes:

  • Most people like a 2-5% salinity ratio, but this depends on your tastes and how your ferment is working for you. You might like a lower or higher salt ratio so it really comes down to the taste you’re looking for.
  • For softer vegetables like cucumbers, sometimes a higher salinity like 5% or above helps keep the cucumbers a little crunchier, but you can also use different leaves with tannins instead
  • Once you get into other ferments like meat, different cheeses, brining olives, making fish sauce, or making a batch of miso the salt ratios can go much high like 10-20% or even more
  • Keep in mind that the higher the salinity of the brine, the longer the fermentation is going to take
  • Don’t forget to add herbs, spices, and aromatics like garlic. Sometimes adding more flavor means you can back off the salt
  • Lemon juice also helps where you can put less salt since you’ll be starting with a brine that’s just a little higher in acid which discourages other bacteria
  • And of course, when fermenting vegetables, you always want whatever you’re fermenting to be below the brine level

I hope some of this information and the salt percentage chart for brine helps. Let me know what you think in the comments below!

Episode 10 – Types of Salt, Brine Basics, and Weight Ratios in Fermentation

Types of Salt, Brine Basics, and Weight Ratios in Fermentation

Today it’s all about salt. It’s just you and me and I talk about the many types of salt is available to you out there, some of the basics when it comes to making brines, and weight ratios you should know and keep in mind when you’re making and following recipes.

You would think that the topic of salt is a simple one but did you know there’s added ingredients in most table salt? What does that do to your ferments and more importantly, are there any healthy salts that could give you a boost in nutrition with it’s added minerals?

When I first started, I began using sea salt and skipped the table salt immediately but I had no idea that there were so many salts out there that you can consider for so many different reasons. Even the topic of iodine deficiency is a big one when it comes to that popular NaCl.

In any case, when creating a starter culture, you want to give it the best it can have so how about giving today’s show a listen and finding out what kinds of salt to use it lactic acid fermentation and pickling?

TOPICS INCLUDED IN TODAY’S FERMENTATION PODCAST:

  • Salt Basics
    • Why should you use salt in fermentation?
    • Does salt help or hurt bacteria when making things like pickles or sauerkraut?
    • Using salt in fermentation and what it does to aerobic yeasts and mold
    • Can you use too much salt when fermenting things?
    • A discussion on the several different types of salt and what types of salt should you use for fermentation?
    • Some of the many salts talked about include:
      • Table salt
      • Iodized table salt
      • Pickling salt
      • Kosher Sea
      • Fleur de sel or “flower of salt
      • Sel gris or “grey salt” also known as Celtic sea salt
      • Pink Himalayan salt
      • Black salt (also known as Kala Namak)
      • Hawaiian sea salt
  • Salt Weights & Brine Basics
    • The weight of salt depends on 3 things – how coarse or fine the salt was ground, the density of the salt, and what the moisture content is
    • My 3 different methods for calculating out salt ratios
      • The exact scientific method of weights using a gram scale to measure salinity percentages
      • Measuring salt by measuring spoon anyways and stick to it method
      • The salt to taste method
  • General Rules of Salinity Ratios
    • Typical salinity ratios you’ll like for fermenting vegetables
    • Keeping vegetables more crisp with more salt
    • A quick word on much higher salinity ratios for other ferments like meat, different cheeses, brining olives, making fish sauce, or making a batch of miso
    • The affect of higher the salinity of the brine you’re making and the longer the fermentation is going to take
    • Decreasing the salt by adding more flavor with herbs, aromatics like garlic and onions and also lemon juice to increase the acidity
    • Backslopping
    • And of course, when fermenting vegetables, keep it below the brine level

LINKS FOR TODAY’S SHOW:

I’d love to hear your thoughts on today’s show so be sure to comment below or if you have an idea for the show, email me at paul at fermentationpodcast.com or just click on the Contact button on top of this page and fill out the form. I look forward to hearing from you!